Classic Meatloaf Recipe: Betty Crocker Tested & Perfected
Meatloaf represents comfort food at its finest—a dish that has graced American dinner tables for generations. The Betty Crocker classic meatloaf recipe stands as a testament to timeless cooking that delivers tender, flavorful results every single time. This iconic recipe combines simple pantry staples with proven techniques to create a meatloaf that keeps families coming back for seconds. Whether you’re a seasoned home cook or someone just beginning your culinary journey, this tested formula ensures success.
The beauty of Betty Crocker recipes lies in their reliability and straightforward approach. This particular meatloaf recipe has been refined through decades of kitchen testing, making it one of the most trustworthy versions available. The combination of ground beef, breadcrumbs, eggs, and seasonings creates a moist, cohesive loaf that slices cleanly and tastes absolutely delicious. Understanding the science behind each ingredient helps you appreciate why this recipe works so consistently well.
What makes this meatloaf truly special is how it bridges tradition with practical home cooking. The recipe requires minimal prep time, uses ingredients you likely already have on hand, and delivers restaurant-quality results from your own oven. Perfect for weeknight dinners or weekend gatherings, this classic preparation method has earned its place as a staple in countless kitchens.
Essential Ingredients for Success
The foundation of any great meatloaf begins with quality ingredients selected with purpose. Each component plays a specific role in creating the perfect texture and flavor profile. Understanding what each ingredient contributes helps you make informed substitutions when necessary.
Ground Beef: The primary ingredient should be ground beef with approximately 80/20 lean-to-fat ratio. This balance ensures your meatloaf stays moist without becoming greasy. Using beef that’s too lean results in a dry, dense loaf, while excessive fat creates an oily finished product. One and a half to two pounds of ground beef serves four to six people adequately.
Breadcrumbs: These act as a binder and moisture absorber, preventing the meatloaf from becoming too dense. Plain breadcrumbs work perfectly, though you can use panko for slightly more texture. The breadcrumbs help distribute the meat evenly throughout the loaf while retaining moisture during cooking. About half to three-quarters cup proves ideal for the standard recipe.
Eggs: Serving as another crucial binder, eggs help hold all ingredients together while adding richness to the final product. Two large eggs provide adequate binding power without making the mixture too wet. The eggs also contribute to a more tender crumb structure throughout your finished meatloaf.
Milk: A quarter cup of whole milk moistens the breadcrumbs and creates a paste-like consistency that distributes evenly through the meat mixture. This step, often called “blooming” the breadcrumbs, ensures every bite has consistent texture. The milk also prevents the meatloaf from drying out during the extended cooking time.
Seasonings: Salt, black pepper, and Worcestershire sauce form the flavor foundation. Onion powder and garlic powder add depth without requiring fresh ingredient prep. A teaspoon each of onion and garlic powder intensifies the savory notes. Some recipes include a tablespoon of Worcestershire sauce for umami complexity that elevates the entire dish.
Optional Additions: Finely minced onions, bell peppers, or celery add moisture and flavor dimension. A quarter cup of ketchup mixed into the meat mixture (not just on top) creates a slightly sweet undertone that balances the savory elements beautifully.
Step-by-Step Preparation Guide
Proper preparation sets the stage for meatloaf success. Taking time with these initial steps ensures your finished product achieves optimal texture and flavor distribution.
Step One: Prepare Your Pan and Oven
Preheat your oven to 350°F (175°C). Line a standard loaf pan with foil or lightly grease it with cooking spray. Some cooks prefer placing the meatloaf on a baking sheet lined with foil, which allows excess fat to drip away during cooking. This method produces a slightly less rich final product. Choose whichever approach aligns with your preferences.
Step Two: Bloom the Breadcrumbs
Pour your breadcrumbs into a small bowl and add the milk. Stir until the breadcrumbs absorb the liquid completely, creating a wet paste-like consistency. Let this mixture sit for two to three minutes, allowing the breadcrumbs to fully hydrate. This blooming process ensures the breadcrumbs distribute evenly throughout the meat and contribute to moisture retention during baking.
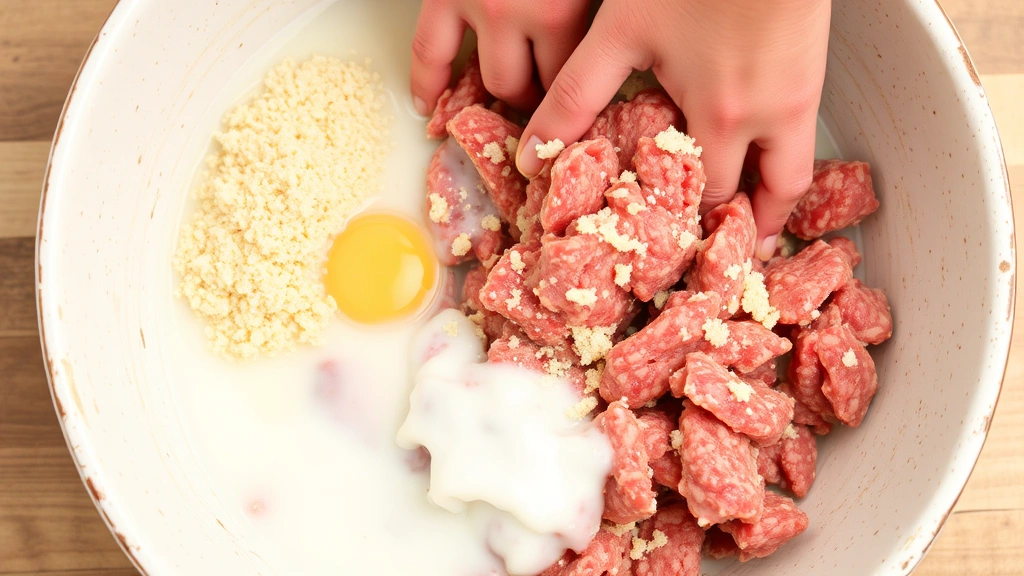
Step Three: Combine the Mixture
Place your ground beef in a large mixing bowl. Add the bloomed breadcrumb mixture, eggs, salt, pepper, Worcestershire sauce, onion powder, and garlic powder. Using your hands, gently combine all ingredients until just mixed. The key word here is “gently”—overworking the mixture creates a dense, tough meatloaf. Mix until the ingredients are distributed evenly, then stop. Your mixture should look slightly loose and not overly compressed.
Step Four: Shape the Meatloaf
Transfer your meat mixture to the prepared pan or baking sheet. If using a loaf pan, press the mixture gently into the pan, creating an even surface. If using a baking sheet, shape the mixture into a loaf approximately 8 inches long and 4 inches wide. Make a slight depression down the center of the loaf—this helps the meatloaf cook more evenly and allows fat to drain away.
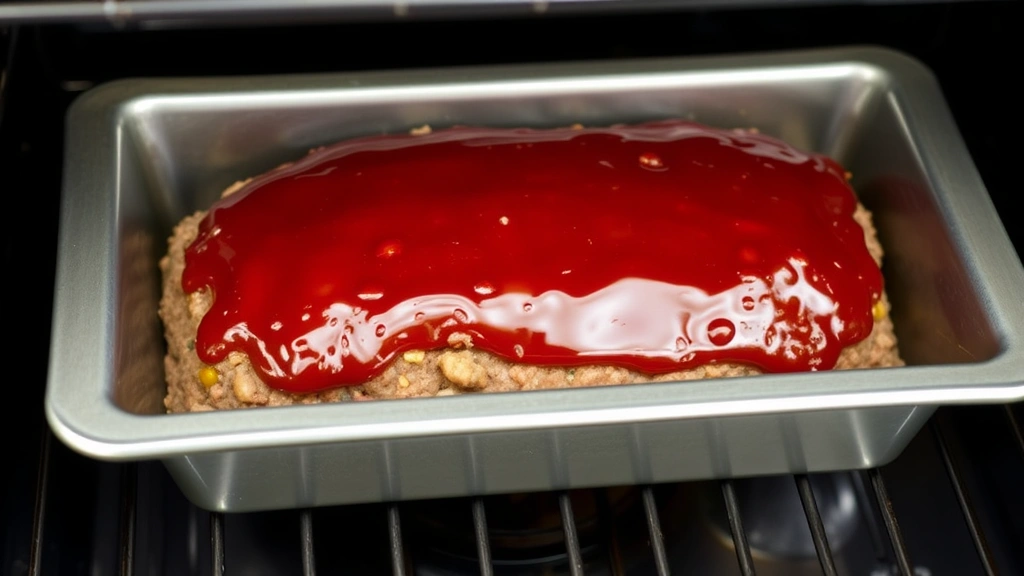
Step Five: Apply the Topping
Mix together half a cup of ketchup, two tablespoons of brown sugar, and one tablespoon of apple cider vinegar. This creates a classic glaze that caramelizes beautifully during baking. Spread this mixture evenly over the top of your shaped meatloaf. The brown sugar adds sweetness that balances the savory beef, while vinegar provides subtle acidity.
Baking and Temperature Guidelines
Understanding proper baking temperatures and times ensures your meatloaf reaches food safety standards while maintaining optimal texture and moisture.
Temperature Targets: Bake your meatloaf at 350°F (175°C) for approximately 55 to 65 minutes, depending on whether you’re using a loaf pan or baking sheet. The internal temperature should reach 160°F (71°C) when measured with a meat thermometer inserted into the thickest part of the loaf, not touching the pan bottom. This temperature kills harmful bacteria while keeping the meat moist.
Checking Doneness: A meat thermometer provides the most accurate doneness indicator. Insert it horizontally into the center of the meatloaf, avoiding the pan bottom. If you don’t have a thermometer, cut into the thickest portion—the juices should run clear with no pink visible. The meatloaf should feel firm to the touch but not hard.
Resting Period: After removing the meatloaf from the oven, let it rest for five to ten minutes before slicing. This resting period allows the juices to redistribute throughout the meat, resulting in more moist, tender slices. Slicing too immediately causes the juices to run out onto the plate instead of staying within the meat.
Fat Drainage: If your meatloaf has accumulated excessive fat in the pan, carefully tilt it and use a turkey baster or spoon to remove the accumulated liquid. This prevents the bottom from becoming soggy while maintaining the moist interior you’ve worked to achieve.
Delicious Variations and Modifications
While the classic Betty Crocker recipe remains timeless, countless variations allow you to customize this dish to your preferences and dietary needs.
Cheese-Filled Meatloaf: Create a pocket down the center of your shaped meatloaf and fill it with shredded cheddar or mozzarella cheese before baking. The cheese melts during cooking, creating a surprise element when slicing. This variation works beautifully with white sauce recipe as an accompaniment.
Vegetable-Packed Version: Finely mince fresh vegetables like mushrooms, bell peppers, zucchini, or spinach and incorporate them into the meat mixture. These additions increase nutritional value while adding moisture and flavor complexity. Start with half a cup of finely chopped vegetables and adjust to your preference.
Gluten-Free Adaptation: Replace regular breadcrumbs with gluten-free bread recipe crumbs or crushed gluten-free crackers. The texture and binding properties remain virtually identical, making this swap seamless for those avoiding gluten.
Turkey or Pork Version: Ground turkey or ground pork can substitute for beef, though you may need to add slightly more fat (in the form of olive oil) since these meats are leaner. Turkey meatloaf requires similar cooking times and temperatures, while pork may cook slightly faster.
BBQ Meatloaf: Replace the ketchup-based glaze with your favorite barbecue sauce for a smokier, more complex flavor profile. This variation pairs beautifully with classic sides and creates a different eating experience while maintaining the meatloaf structure.
Mini Meatloaves: Divide your mixture among a muffin tin, creating individual portions. These cook in 20 to 25 minutes and provide portion control plus faster cooking times. They’re perfect for meal prep and freeze beautifully for later use.
Serving Suggestions and Pairings
The classic meatloaf serves as a versatile centerpiece that pairs well with numerous side dishes and accompaniments.
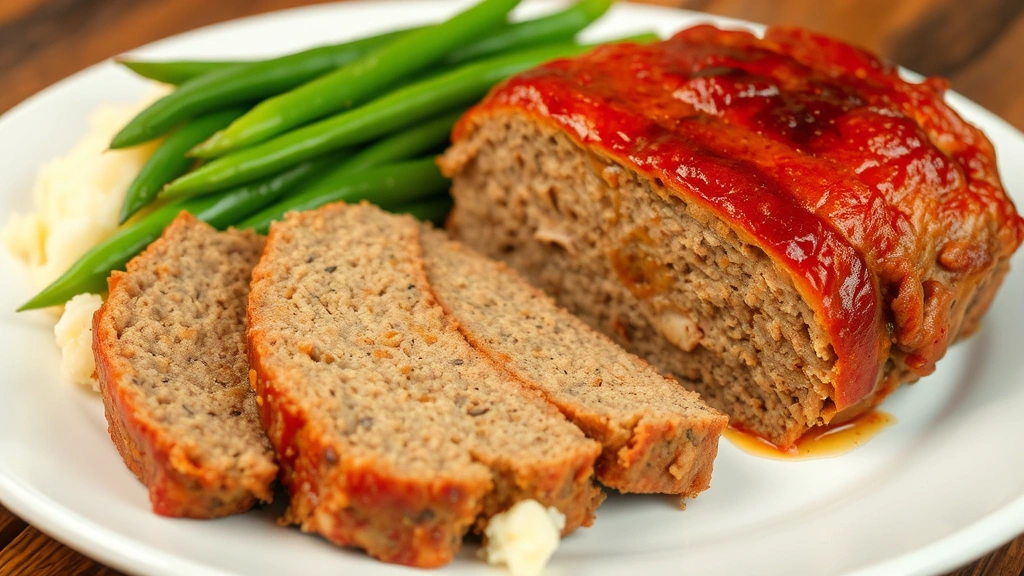
Traditional Pairings: Mashed potatoes and green beans represent the quintessential meatloaf accompaniment. The creamy potatoes balance the rich meatloaf, while green beans provide lightness and color contrast. A simple salad dressed with homemade salad dressings adds freshness to the plate.
Bread-Based Sides: Serve alongside homemade bread for soaking up the delicious pan juices. Cornbread offers a slightly sweet complement, while garlic bread adds richness. For a lighter option, consider sourdough pizza crust recipe techniques applied to make artisan dinner rolls.
Vegetable Sides: Roasted vegetables like carrots, Brussels sprouts, or sweet potatoes work wonderfully alongside meatloaf. Steamed broccoli or cauliflower provides lighter options that won’t overwhelm the palate. Corn, peas, or mixed vegetables offer familiar comfort-food pairings.
Sauce Accompaniments: Beyond the glaze on top, consider serving additional sauces on the side. Mushroom gravy, tomato sauce, or a simple pan sauce made from the meatloaf drippings elevates the eating experience. Some families enjoy serving ketchup or mustard separately for individual preference.
Special Occasions: For grandma’s recipe box summer potluck gatherings, meatloaf serves as an impressive main dish that feeds crowds affordably. Prepare multiple loaves, slice them, and arrange on a platter with serving utensils for buffet-style service.
Storage and Reheating Tips
Refrigerator Storage: Properly stored meatloaf keeps for three to four days in an airtight container. Cool the meatloaf completely before storing to prevent condensation that creates sogginess. Store any pan juices separately to pour over reheated slices.
Freezing Instructions: Wrap cooled meatloaf tightly in plastic wrap, then place in a freezer-safe container or bag. Label with the date and freeze for up to three months. Thaw overnight in the refrigerator before reheating. You can also freeze individual slices for quick meals.
Reheating Methods: Slice cold meatloaf and arrange slices in a baking dish. Cover with foil and reheat at 350°F for 15 to 20 minutes until heated through. Alternatively, microwave individual slices on 50% power for 60 to 90 seconds to prevent overcooking. The oven method preserves texture better than microwaving.
Meatloaf Sandwiches: Leftover meatloaf makes exceptional sandwiches. Slice the cold meatloaf, layer between bread slices with lettuce, tomato, and condiments. Toasting the bread adds texture contrast. Meatloaf sandwiches taste even better than the original meal, making them worth planning for.
Creative Leftovers: Crumble leftover meatloaf into pasta sauce, chili, or tacos for entirely new meals. Mix with mashed potatoes to create shepherd’s pie filling. The possibilities extend your initial investment in the recipe.
Frequently Asked Questions
Why is my meatloaf dry?
Dryness typically results from overcooking or insufficient fat content. Ensure your ground beef has an 80/20 ratio, use adequate breadcrumbs bloomed in milk, and avoid overworking the mixture. Remove the meatloaf from the oven when it reaches exactly 160°F internally—cooking beyond this temperature causes moisture loss. Resting the meatloaf after cooking allows juices to redistribute.
Can I make meatloaf ahead of time?
Yes, you can prepare the mixture up to 24 hours before baking. Cover the prepared meatloaf tightly with plastic wrap and refrigerate until ready to bake. Add 5 to 10 minutes to the baking time if cooking directly from the refrigerator without thawing. This advance preparation makes weeknight dinner assembly incredibly convenient.
What’s the best way to prevent cracking on top?
Cracking occurs from too-high oven temperature or rapid moisture loss. Maintain a consistent 350°F temperature throughout baking. Applying the glaze before baking helps seal the surface and promote even cooking. Creating a slight depression down the center also helps distribute heat more evenly.
How do I know if my meatloaf is cooked through?
Use a meat thermometer inserted into the thickest part of the loaf—160°F indicates doneness. If you lack a thermometer, cut into the center; juices should run clear with no pink visible. The meatloaf should feel firm but not rock-hard when pressed with your finger.
Can I substitute other meats for beef?
Ground turkey, pork, or lamb work well as substitutes. Turkey and pork are leaner, so consider adding a tablespoon of olive oil to the mixture. Cooking times and temperatures remain the same. Ground lamb creates a distinctly different flavor profile worth exploring.
Why should I rest the meatloaf after cooking?
Resting allows the internal temperature to stabilize and muscle fibers to relax, reabsorbing juices. Without resting, slicing immediately causes juices to run out onto the plate, resulting in drier meat. Five to ten minutes of resting makes a significant difference in the final texture and moistness.
Is it necessary to bloom the breadcrumbs?
Blooming the breadcrumbs in milk ensures they hydrate fully and distribute evenly throughout the meat mixture. This step prevents dry spots and creates consistent texture throughout the loaf. While technically optional, this step dramatically improves the final product quality.
Can I use fresh breadcrumbs instead of dry?
Fresh breadcrumbs work but may require less milk since they contain more moisture. Start with about two tablespoons of milk and adjust as needed to achieve a wet paste-like consistency. The final texture may be slightly more tender with fresh breadcrumbs.
The Betty Crocker classic meatloaf recipe represents timeless American home cooking at its finest. This tested formula delivers consistent, delicious results that satisfy families and impress guests alike. Whether you follow the recipe exactly or customize it with your preferred variations, understanding the basic principles ensures success. The combination of quality ingredients, proper technique, and appropriate cooking temperature creates a meatloaf that deserves its place as a beloved comfort food classic. Try this recipe tonight and discover why generations of cooks have trusted this approach.


