Minecraft Cake Recipe: A Gamer’s Guide to Crafting the Perfect Real-Life Cake
Whether you’re a devoted Minecraft player or simply looking for a fun, themed dessert that captures the blocky charm of the gaming world, a Minecraft cake brings pixelated joy to any celebration. This guide transforms the virtual cake recipe from the game into an actual, delicious dessert that even non-gamers will love. We’ll walk you through everything from ingredient selection to decorating techniques that make your cake look like it jumped straight out of the game.
Creating a Minecraft cake in real life is more approachable than you might think. By combining classic cake-baking techniques with creative decoration methods, you’ll produce a showstopping centerpiece that captures the essence of the game’s iconic cubic aesthetic. Whether you’re preparing this for a gaming party, a child’s birthday, or simply to impress fellow enthusiasts, this comprehensive guide covers all the essentials.
Understanding the Minecraft Cake Concept
In Minecraft, the cake is a consumable food item that restores hunger points when eaten. The in-game cake features a distinctive blocky design with visible candles and a three-dimensional cubic appearance. This visual style provides excellent inspiration for a real-world cake design that’s both recognizable to gamers and visually striking to everyone else.
The beauty of a Minecraft-themed cake lies in its geometric simplicity. Unlike cakes that require complex sculpting or hand-painted details, a Minecraft cake embraces square shapes and bold colors. This makes it accessible for bakers of varying skill levels. You can create this cake using square cake pans, fondant, buttercream, or even colored frosting piped onto a traditional round cake.
Before diving into baking, consider your audience and skill level. A simple square cake with green frosting and pixelated decorations works perfectly for casual celebrations. For more elaborate versions, you might incorporate multiple layers, fondant work, or even edible images. The approach you choose depends on your experience level and the impression you want to make.

Essential Ingredients and Supplies
Creating an authentic Minecraft cake requires gathering specific ingredients and tools. Start with quality baking ingredients that form the foundation of your cake. All-purpose flour, eggs, butter, and sugar are non-negotiable basics. These easy-to-source ingredients ensure your cake has excellent texture and flavor.
Cake Ingredients:
- 2 cups all-purpose flour
- 1½ teaspoons baking powder
- ½ teaspoon salt
- ½ cup unsalted butter, softened
- 1 cup granulated sugar
- 2 large eggs
- 1 teaspoon vanilla extract
- ½ cup whole milk
Frosting and Decoration Supplies:
- 2 cups unsalted butter
- 4 cups powdered sugar
- 3-4 tablespoons heavy cream or milk
- Gel food coloring (green, brown, red, yellow)
- Fondant or modeling chocolate (optional)
- Edible gold dust (optional)
- Piping bags and tips
Essential Equipment:
- Two 8-inch square cake pans
- Mixing bowls (at least 2)
- Electric mixer or whisk
- Rubber spatula
- Measuring cups and spoons
- Oven thermometer
- Cake cooling racks
- Offset spatula
- Piping bags and decorating tips
- Turntable (recommended but not essential)
Having the right tools makes the decorating process significantly easier. While you can improvise with some items, investing in quality piping bags and tips elevates your final presentation. Square cake pans are particularly important for achieving the authentic blocky Minecraft aesthetic.
Baking Your Base Cake Layer
The foundation of any great Minecraft cake is a moist, flavorful cake layer. Begin by preheating your oven to 350°F (175°C). This temperature ensures even baking without over-browning the exterior. Position your racks so the cake sits in the middle of the oven for optimal heat circulation.
Step-by-step baking instructions:
- Prepare your pans: Grease both square cake pans thoroughly with butter or cooking spray. Line the bottoms with parchment paper for easy removal. This prevents sticking and ensures clean edges for your final presentation.
- Combine dry ingredients: In a medium bowl, whisk together flour, baking powder, and salt. This aerates the flour and distributes the leavening agent evenly throughout the mixture.
- Cream butter and sugar: Using an electric mixer on medium speed, beat softened butter and sugar together for 3-4 minutes until the mixture becomes light and fluffy. This process incorporates air, resulting in a tender crumb structure.
- Add eggs and vanilla: Add eggs one at a time, beating well after each addition. Pour in the vanilla extract and mix until fully incorporated. Scrape down the bowl frequently to ensure even distribution.
- Alternate wet and dry ingredients: Add the flour mixture in three additions, alternating with milk in two additions. Begin and end with the flour mixture. Mix on low speed until just combined after each addition to avoid overdeveloping gluten.
- Divide and pour: Divide the batter evenly between your prepared pans. Use an offset spatula to smooth the tops. This ensures even baking and level cake layers.
- Bake: Place both pans in the preheated oven and bake for 28-32 minutes. The cakes are done when a toothpick inserted in the center comes out clean or with a few moist crumbs.
- Cool properly: Allow cakes to cool in the pans for 10 minutes before turning them out onto cooling racks. Complete cooling takes approximately 2 hours. Never frost a warm cake, as the frosting will melt.
Temperature accuracy is crucial in baking. Consider using an oven thermometer to verify your oven’s actual temperature, as many home ovens run hot or cold. This single step prevents countless baking disasters.
Creating the Pixelated Design
The pixelated aesthetic is what makes a Minecraft cake immediately recognizable. This design element transforms an ordinary cake into a gaming-themed masterpiece. You have several approaches to achieve this blocky appearance, each with varying difficulty levels.
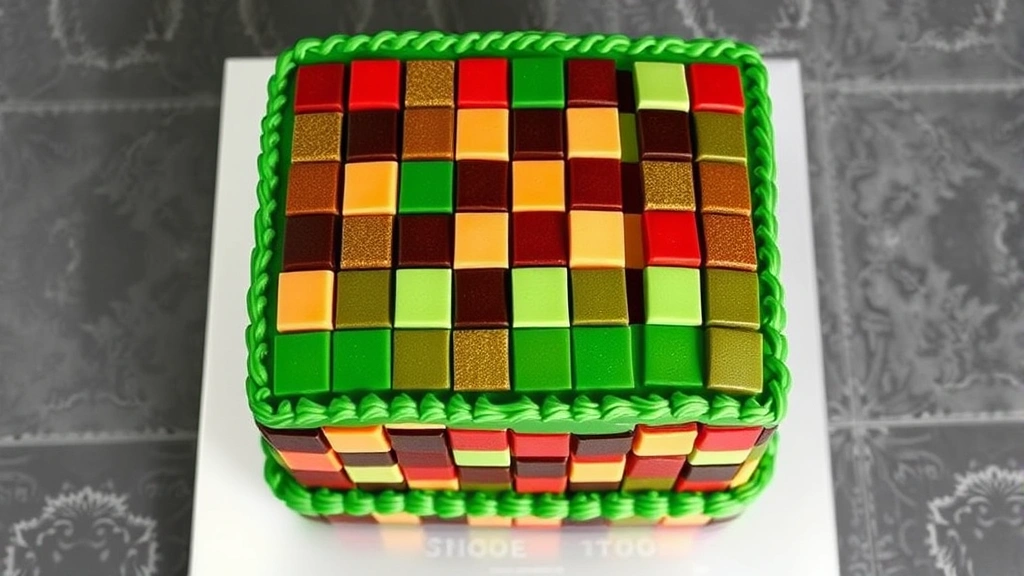
Method 1: Fondant Squares (Intermediate)
Roll out fondant in your chosen colors and cut small squares using a sharp knife or fondant cutter. The classic Minecraft cake features a green top with a brown side and red accents representing the candle. Arrange these fondant squares in a grid pattern on your frosted cake. This method provides a three-dimensional effect that closely mimics the game’s aesthetic.
Method 2: Buttercream Piping (Beginner-Friendly)
Using piping bags fitted with small square or round tips, pipe individual colored dots or small squares across your frosted cake. This technique requires practice but doesn’t demand advanced skills. Start with a base layer of green frosting, then pipe contrasting colors to create depth and dimension.
Method 3: Edible Image Transfer (Easiest)
Print a Minecraft cake design on edible paper using food-safe ink. Apply this image directly to your frosted cake. While this requires less hands-on decorating, it still produces impressive results. Many online bakery supply stores offer pre-designed Minecraft cake toppers and images.
The pixelated pattern should follow the classic Minecraft color scheme: green for grass, brown for wood or dirt, and red or orange for the candle. These colors are instantly recognizable to anyone familiar with the game. If decorating for non-gamers, the blocky pattern alone creates visual interest and sophistication.
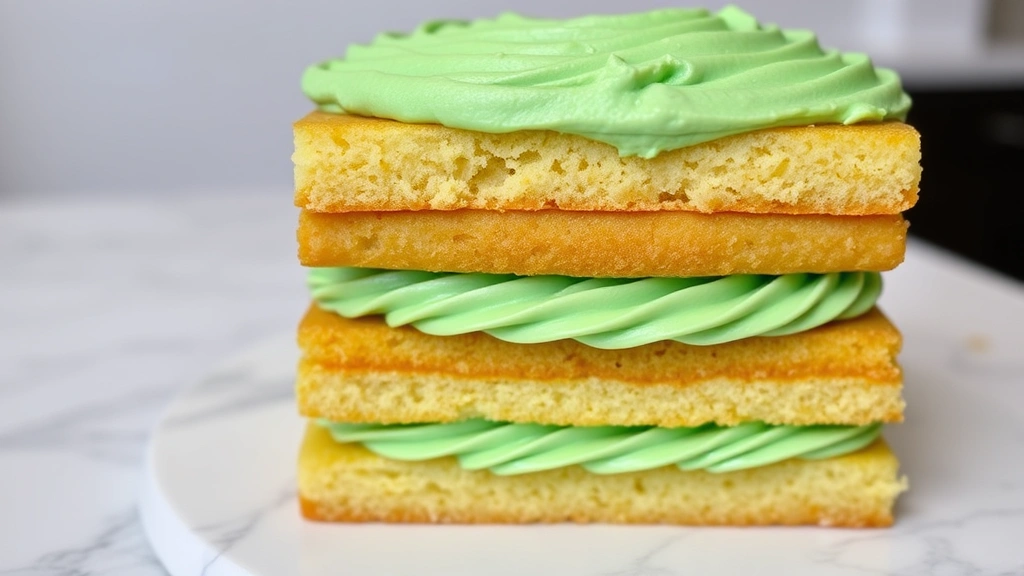
Frosting and Assembly Techniques
Proper frosting technique determines whether your cake looks professional or homemade. Buttercream frosting works beautifully for Minecraft cakes because it’s forgiving and holds piped details well. Here’s how to create and apply it correctly.
Buttercream Frosting Recipe:
- Beat 2 cups of softened unsalted butter on medium speed for 2-3 minutes until pale and fluffy.
- Gradually add 4 cups of powdered sugar, one cup at a time, beating well after each addition.
- Add 3-4 tablespoons of heavy cream or milk to reach your desired consistency.
- Beat on high speed for an additional 2-3 minutes until light and fluffy.
- Divide the frosting into bowls and add gel food coloring to create your Minecraft palette.
Assembly Steps:
- Level your cakes: Using a serrated bread knife or cake leveler, trim any domed tops from your cooled cake layers. Level cakes stack better and look more professional.
- Apply crumb coat: Place your first cake layer on a turntable or serving plate. Apply a thin layer of frosting around the sides and top. This crumb coat seals in loose crumbs. Refrigerate for 15 minutes.
- Add filling: Once the crumb coat is set, apply a thicker frosting layer. This filling should be about ¼-inch thick. You might add jam, fruit curd, or additional frosting for flavor complexity.
- Stack layers: Place your second cake layer on top, pressing gently to ensure stability. The layers should be level and secure.
- Final frosting coat: Apply a generous layer of frosting to the top and sides. Use an offset spatula to create smooth sides or textured finishes depending on your style preference.
- Chill before decorating: Refrigerate the assembled, frosted cake for at least 30 minutes. A chilled cake is easier to decorate and holds details better.
Like preparing layered recipes with multiple components, patience and proper chilling times ensure success. Never rush the frosting process, as temperature control is crucial.
Advanced Decoration Methods
Once your base cake is frosted and chilled, decoration transforms it into a show-stopping centerpiece. Advanced techniques elevate your Minecraft cake from good to extraordinary.
Fondant Modeling
Create three-dimensional fondant elements like pickaxes, swords, or character heads. These add dimension and gaming authenticity. Model fondant elements separately and allow them to dry for 24 hours before placing them on the cake. This prevents them from drooping or damaging the frosting.
Airbrushing Techniques
An airbrush creates smooth color gradients and detailed shading that’s difficult to achieve with piping bags. While requiring specialized equipment, airbrushing produces professional results. Spray a light mist of darker green on the grass-colored areas to create depth and shadow.
Stenciling
Create or purchase Minecraft-themed stencils. Dust powdered sugar, cocoa powder, or edible glitter through the stencil onto your frosted cake. This creates crisp, detailed designs without requiring advanced piping skills.
Edible Glitter and Dust
Brush edible gold dust on fondant squares for a shimmering effect. Sprinkle edible glitter around the cake’s base or on specific design elements. These additions catch light and create visual drama.
Piped Details
Using a piping bag fitted with a small round tip, pipe tiny details like eyes on character representations or texture lines on terrain blocks. This requires a steady hand but creates impressive results with practice.
Remember that layering flavors and creating complexity applies to cake decoration as well. Combine multiple techniques for the most impressive presentation.
Storage and Serving Tips
Proper storage ensures your Minecraft cake remains fresh and visually stunning until serving time. A decorated cake requires special care to maintain its appearance and taste.
Short-term Storage (1-2 Days):
- Store the decorated cake in an airtight cake box or covered with plastic wrap in a cool location away from direct sunlight.
- Room temperature storage works fine if your kitchen stays below 72°F (22°C).
- Avoid refrigerating buttercream-frosted cakes unless necessary, as cold temperatures can cause condensation and damage decorations.
Long-term Storage (3-5 Days):
- Refrigerate the cake in an airtight container on a shelf away from strong-smelling foods.
- Bring the cake to room temperature for 30 minutes before serving for optimal flavor and texture.
- Fondant elements may become slightly sticky in humid refrigerator conditions; place parchment paper between layers.
Freezing (Up to 1 Month):
- Wrap the unfrosted cake layers tightly in plastic wrap and aluminum foil.
- Freeze buttercream in separate containers.
- Thaw cake layers at room temperature for 2-3 hours before frosting and decorating.
- Avoid freezing fondant-decorated cakes, as the moisture creates texture issues.
Serving Suggestions:
- Use a sharp, thin-bladed knife dipped in hot water for clean cake slices.
- Wipe the knife clean between cuts for presentation purposes.
- Serve cake with complementary beverages like milk for children or coffee for adults.
- Display the cake on a cake stand or elevated surface to showcase your decorative work.
Consider pairing your Minecraft cake with other easy-to-prepare game-day foods if serving at a gaming party. This creates a cohesive celebration menu.
FAQ
Can I make a Minecraft cake without fondant?
Absolutely! Buttercream piping, edible image transfers, and simple frosting techniques work beautifully without fondant. Many bakers prefer buttercream for its taste and easier application. Fondant offers a smoother finish but requires more specialized skills.
How far in advance can I bake the cake layers?
Bake cake layers up to 3 days ahead. Wrap unfrosted layers tightly in plastic wrap and store at room temperature. This allows you to focus on frosting and decorating closer to serving time. Some bakers prefer baking a day ahead for optimal moisture content.
What’s the best way to transport a decorated Minecraft cake?
Place the cake in a sturdy cake box with corner supports. Keep the box level during transport and avoid placing heavy items on top. Transport in a climate-controlled vehicle, never in a hot trunk. If traveling far, consider assembling and decorating the cake at your destination.
Can I use a round cake pan instead of square?
While a round pan produces a traditional cake, square pans better capture the Minecraft aesthetic. However, you can still create a recognizable Minecraft design on a round cake using pixelated decorations on the surface.
How do I prevent fondant from cracking?
Keep fondant at room temperature while working. If it becomes too dry, knead in small amounts of shortening or glycerin. Work quickly but gently, and avoid stretching the fondant excessively. Store unused fondant in an airtight container.
What’s the difference between buttercream and fondant frosting?
Buttercream is butter-based, creamy, and delicious. It’s easier to apply but shows piping marks. Fondant is sugar-based, provides a smooth finish, and requires more technical skill. Both work for Minecraft cakes; choose based on your preference and skill level.
Can I make this cake gluten-free?
Yes! Substitute all-purpose flour with a 1:1 gluten-free baking blend. Some bakers add an extra egg yolk for moisture. The resulting cake may have a slightly different crumb structure but will still taste delicious. All other ingredients and techniques remain the same.
How much does a homemade Minecraft cake cost?
Expect to spend $20-40 in ingredients for a two-layer 8-inch cake. Specialty items like fondant or edible glitter add to this cost. This remains significantly less expensive than ordering a custom cake from a bakery while allowing complete creative control.
What’s the best filling flavor for a Minecraft cake?
Chocolate, vanilla, or fruit fillings all work well. Chocolate pairs beautifully with vanilla cake, while fruit curd adds brightness. Some gamers prefer simple buttercream filling to maintain focus on the decorative design.
Can I make a larger Minecraft cake for a big party?
Scale up by using larger cake pans or baking multiple cakes. A 10-inch square cake requires longer baking time (35-40 minutes). For very large gatherings, consider baking two separate 8-inch cakes and stacking them or placing them side-by-side to create a larger surface area for decoration.


