Cauliflower Crust Pizza: A Healthy Homemade Guide
Cauliflower crust pizza has revolutionized the way health-conscious home cooks approach this beloved comfort food. By swapping traditional wheat flour for nutrient-dense cauliflower, you can enjoy pizza night without the guilt or blood sugar spikes. This homemade approach gives you complete control over every ingredient, from the crust composition to your toppings, making it perfect for anyone following low-carb, keto, or simply cleaner eating patterns.
Making cauliflower crust pizza at home is surprisingly straightforward, requiring just a food processor, some basic pantry staples, and about 45 minutes from start to finish. Unlike store-bought frozen versions that often contain additives and preservatives, your homemade version will taste fresher and deliver superior nutritional benefits. The slightly nutty flavor of roasted cauliflower pairs beautifully with both traditional marinara and creative gourmet toppings.
Whether you’re exploring high protein low calorie recipes or simply want to incorporate more vegetables into your diet, this guide will walk you through every step of creating restaurant-quality cauliflower crust pizza in your own kitchen.
Why Choose Cauliflower Crust?
Cauliflower crust pizza offers multiple advantages over traditional pizza bases. A single slice of regular pizza contains approximately 25-30 grams of carbohydrates, while cauliflower crust delivers just 5-7 grams per slice. This dramatic reduction makes it ideal for anyone managing blood sugar levels or following keto soup recipes and low-carb dietary patterns.
Beyond carb reduction, cauliflower brings substantial nutritional value to your plate. This cruciferous vegetable contains vitamins C and K, folate, and powerful antioxidants like sulforaphane. When you make your own crust, you’re essentially eating a vegetable-based foundation rather than empty carbohydrates, transforming pizza from indulgence into genuine nutrition.
The texture of homemade cauliflower crust differs from wheat-based pizza—it’s more delicate and slightly crumbly, which some people prefer. The key to achieving that satisfying bite is proper moisture removal during preparation. Many home cooks struggle with soggy crusts, but following the techniques outlined in this guide will ensure you get crispy, structurally sound results every time.
Cost-effectiveness is another compelling reason to make cauliflower crust at home. A head of fresh cauliflower costs significantly less than specialty pizza crusts or frozen cauliflower crust products. You’ll also reduce food waste reduction by using the entire head, with leaves and stems suitable for soups or stir-fries.
Essential Ingredients and Substitutions
For the Crust:
- 1 medium head of cauliflower (approximately 4-5 cups florets)
- 1 large egg or 2 tablespoons aquafaba (for vegan option)
- ½ cup shredded mozzarella cheese (or dairy-free alternative)
- ¼ cup grated Parmesan cheese
- 1 teaspoon Italian seasoning
- ½ teaspoon garlic powder
- ¼ teaspoon sea salt
- ¼ teaspoon black pepper
- Optional: 1 tablespoon ground flaxseed for extra binding
For Topping:
- ½ cup sugar-free marinara sauce or tomato sauce
- 1 cup shredded mozzarella cheese
- Your choice of vegetables, proteins, and seasonings
Understanding Your Ingredient Choices:
The egg acts as a binder, holding the cauliflower and cheese together during baking. If you’re vegan, aquafaba (the liquid from canned chickpeas) works equally well, though you may need to add 1-2 tablespoons extra for proper consistency. Some recipes incorporate almond flour or coconut flour for additional structure, but these are optional and can alter the flavor profile.
Cheese selection matters significantly. Full-fat mozzarella provides better melting and binding properties than low-fat versions. If you’re lactose-intolerant, quality dairy-free mozzarella blends have improved dramatically and will work in this application. For recipes with shredded chicken as a topping, ensure your cheese has sufficient fat content to help the crust hold together while you add protein-rich toppings.
The seasoning blend is entirely customizable. Some cooks prefer adding fresh herbs like basil or oregano, while others incorporate everything bagel seasoning for complexity. Experiment with small adjustments to match your preferences.
Step-by-Step Preparation
Step 1: Process the Cauliflower
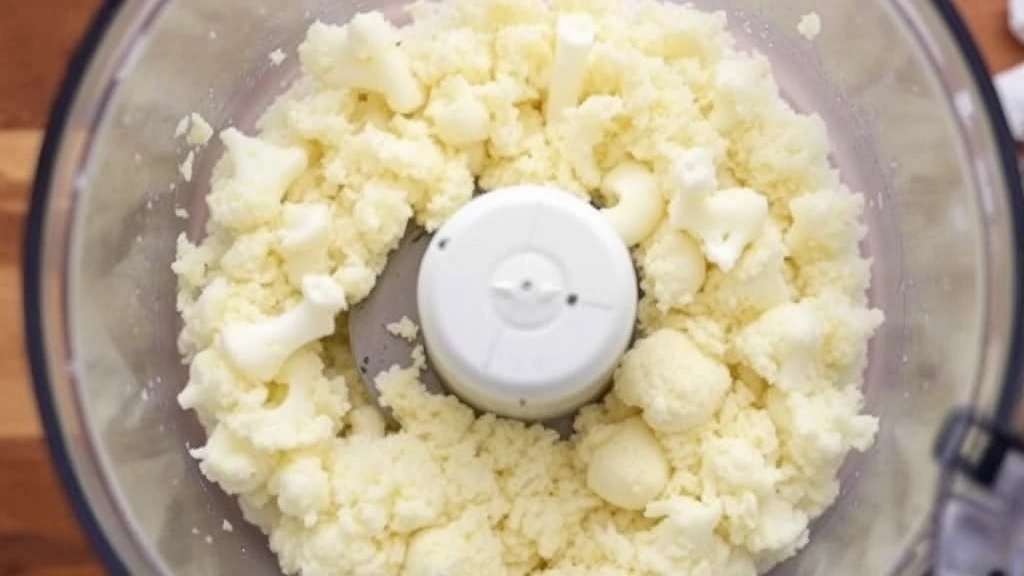
Wash your cauliflower head thoroughly and cut it into florets, removing the stem. Using a food processor fitted with the blade attachment, pulse the florets until they resemble fine breadcrumbs or rice. This step is crucial—pieces that are too large won’t cook evenly, while over-processing creates a paste. Process in batches if necessary, pulsing rather than running continuously.
Step 2: Remove Excess Moisture
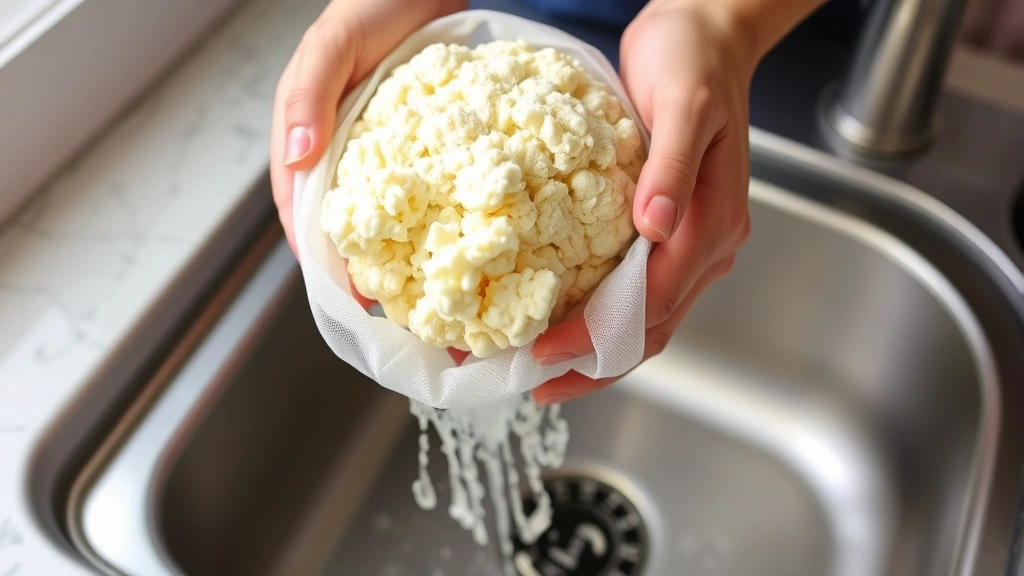
This is the most critical step for avoiding soggy crust. Place your processed cauliflower into a clean kitchen towel or cheesecloth and squeeze firmly over the sink, removing as much liquid as possible. You should see significant moisture release. Some cooks prefer microwaving the cauliflower for 5-7 minutes first, then squeezing—this additional step removes even more water and is worth the extra effort.
Step 3: Combine Ingredients
In a large mixing bowl, combine your moisture-reduced cauliflower with the egg, both cheeses, and all seasonings. Mix thoroughly with a sturdy spatula or your hands until everything is evenly distributed. The mixture should hold together when squeezed but not feel wet. If it’s too dry, add the beaten egg one tablespoon at a time. If too wet, let it sit for 10 minutes to allow excess moisture to drain.
Step 4: Shape the Crust
Line a baking sheet with parchment paper. Transfer your cauliflower mixture to the prepared sheet and shape it into a pizza round approximately ¼-inch thick. Use your hands or the back of a spatula, working from the center outward. Create slightly raised edges to contain toppings and sauce. Don’t worry about perfect symmetry—rustic, slightly irregular shapes add character and often have superior texture distribution.
Baking Techniques for Perfect Crust
Pre-Baking the Crust
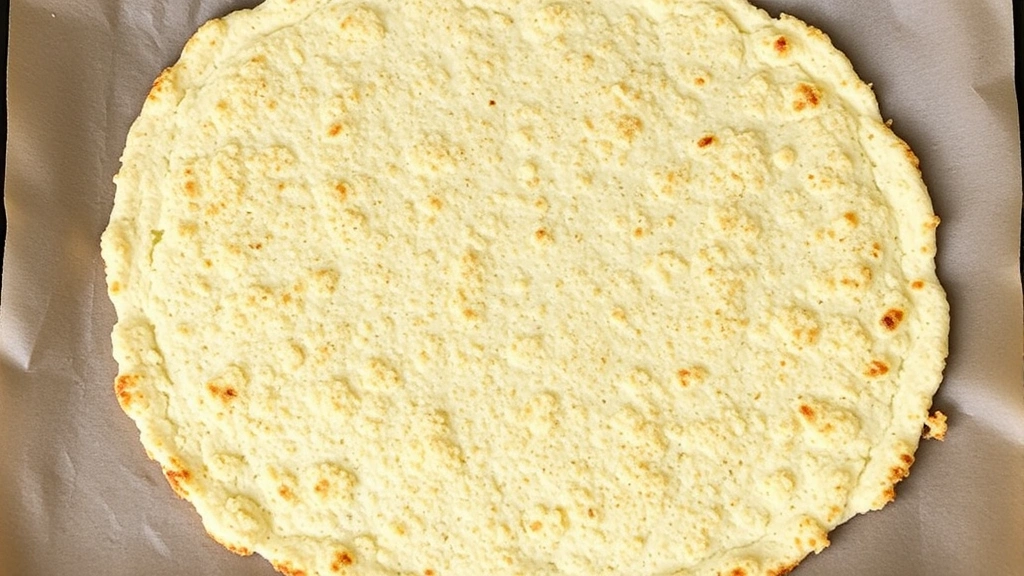
Preheat your oven to 400°F (200°C). This pre-baking step is essential for achieving a crispy base that won’t become soggy under toppings. Place your shaped crust in the preheated oven for 20-25 minutes, or until the edges are golden brown and the surface appears set. The crust should be firm enough to hold together when you gently press it.
Many home cooks skip pre-baking and regret it—the crust becomes too soft and difficult to slice. Trust the process. Your patience here directly translates to pizza that holds together beautifully on the plate.
Adding Toppings
Remove the pre-baked crust from the oven. Spread your sauce thinly—cauliflower crust is more delicate than wheat-based crusts and can become soggy with excessive moisture. Distribute cheese and other toppings evenly, being mindful not to overload one area. A general rule: cover about 75% of the surface, leaving some crust edge visible.
Final Baking
Return the topped pizza to the oven for 10-15 minutes, until the cheese is melted and bubbly. If you’re using fresh vegetables that release moisture (tomatoes, mushrooms), consider pre-cooking them slightly to avoid additional moisture. The final pizza should have lightly browned cheese with no raw spots.
Oven temperatures vary, so keep an eye on your pizza during this final stage. If the crust appears to be browning too quickly while cheese is still cold, reduce temperature by 25°F and continue baking. Conversely, if cheese isn’t melting, increase temperature slightly or move the pizza closer to your oven’s heating element.
Topping Ideas and Flavor Combinations
Classic Margherita Style
Layer fresh mozzarella, fresh basil, and sliced tomatoes over your sauce. This simple combination highlights the cauliflower crust’s delicate flavor. The freshness of basil added post-baking creates brightness that complements the slightly nutty crust.
Protein-Packed Combinations
For those interested in high protein low calorie recipes, consider using recipes with shredded chicken as your primary topping. Combine shredded rotisserie chicken with caramelized onions, crispy bacon, and reduced-fat mozzarella. This combination delivers substantial protein while keeping calories moderate.
Vegetable-Forward Options
Roasted vegetables work beautifully on cauliflower crust. Try combinations like: zucchini, bell peppers, and red onions with goat cheese and fresh thyme; or broccoli, sun-dried tomatoes, and pine nuts with ricotta. The vegetable-on-vegetable approach creates interesting textural contrasts.
Mediterranean Inspired
Layer white sauce (made from Greek yogurt and garlic) with spinach, kalamata olives, sun-dried tomatoes, and feta cheese. This flavor profile is bold and satisfying without being heavy.
BBQ Chicken Pizza
Spread sugar-free BBQ sauce on your pre-baked crust, top with shredded chicken, red onions, and cilantro. Add cheese before baking, then finish with fresh cilantro after. This variation proves cauliflower crust works with diverse flavor profiles.
Storage and Make-Ahead Tips
Refrigerator Storage
Leftover cauliflower crust pizza keeps well in the refrigerator for 3-4 days when stored in an airtight container. Reheat in a 350°F oven for 8-10 minutes until warmed through, rather than using the microwave, which can make the crust soggy.
Freezing Unbaked Crusts
You can prepare cauliflower crust mixture in advance. Shape it, place on parchment paper on a baking sheet, freeze until solid (2-3 hours), then transfer to a freezer bag. Store for up to one month. When ready to use, bake from frozen, adding 5-10 minutes to the pre-baking time. This convenience factor makes batch preparation worthwhile.
Freezing Baked Crusts
Pre-baked but untoppings crusts also freeze beautifully. Wrap cooled crusts in parchment paper, then foil, and freeze for up to two months. Thaw at room temperature for 30 minutes before topping and final baking.
Meal Prep Strategy
Prepare several cauliflower crust bases on Sunday, pre-bake them, and store in the refrigerator. Throughout the week, add different toppings for variety. This approach is similar to healthy crockpot recipes philosophy—doing the hard work upfront for convenient meals throughout the week.
Preventing Texture Issues
If you notice your stored crusts becoming softer, it’s likely from absorbed moisture. Ensure they’re stored in truly airtight containers with no condensation inside. Some cooks place a paper towel in the container to absorb any residual moisture.
FAQ
Why is my cauliflower crust falling apart?
Insufficient moisture removal is the primary culprit. Squeeze your processed cauliflower harder and longer—you should remove noticeably more liquid than seems necessary. If it’s still falling apart, add one beaten egg or a tablespoon of ground flaxseed mixed with water as an additional binder.
Can I use frozen cauliflower rice?
Yes, but thaw it completely and squeeze out excess moisture thoroughly. Frozen cauliflower often contains more water than fresh, so this step is even more critical. You may also need slightly less liquid in your egg binder.
Is cauliflower crust pizza really low-carb?
Homemade versions are significantly lower in carbs than traditional pizza—approximately 5-7 grams per slice versus 25-30 grams. However, toppings matter. Avoid high-carb sauces and pair with vegetable-forward toppings for optimal carb reduction.
How thick should my crust be?
Aim for approximately ¼-inch thickness for a pizza that’s crispy yet substantial. Thinner crusts (⅛-inch) are more delicate but crispier. Thicker versions (½-inch) require longer cooking times and more pre-baking. Personal preference dictates the ideal thickness.
What’s the best sauce for cauliflower crust?
Traditional marinara works beautifully, but cauliflower crust’s mild flavor pairs well with various sauce options. Try pesto, white sauce, BBQ sauce, or even curry-based sauces. The key is using moderate amounts to prevent sogginess.
Can I make this dough in a food processor instead of by hand?
The food processor is for processing the raw cauliflower only. Once you’ve removed moisture, mixing the final batter by hand gives you better control over consistency and ensures even ingredient distribution.
How do I know when the crust is done pre-baking?
The edges should be golden brown and the surface should feel firm when gently pressed. A fully cooked crust will hold together when you insert a spatula underneath. If it feels soft or wet, return it to the oven for another 5 minutes.
Is this suitable for people with cauliflower allergies?
Unfortunately, no—cauliflower is the primary ingredient. However, broccoli and Brussels sprouts have been used in similar crust recipes with varying degrees of success.
Can I add herbs directly to the crust?
Absolutely. Fresh or dried herbs like basil, oregano, thyme, or rosemary integrate well into the batter. Use 1-2 teaspoons dried herbs or 1 tablespoon fresh, finely chopped herbs per batch.
What’s the difference between homemade and store-bought cauliflower crust?
Homemade versions typically have fresher flavor, fewer additives, and customizable texture. Store-bought options offer convenience but often contain stabilizers, preservatives, and sometimes added starches that increase carb content. Nutritionally and flavor-wise, homemade is superior, though store-bought works in a pinch.
For additional cooking technique guidance, consult resources like Culinary Schools.org, which offers comprehensive information on vegetable preparation methods. The Serious Eats kitchen science section provides excellent explanations of how moisture affects crust texture. For ingredient information, Food Pairing.com helps identify complementary flavor combinations. Explore The Spruce Eats for additional pizza variations, and Food Science News for the nutritional science behind vegetable-based alternatives.


