
Crispy Rice Recipe: Chef’s Secret Technique for Perfect Texture Every Time
Achieving that elusive crispy rice texture is one of the most rewarding skills a home cook can master. Whether you’re preparing a standalone side dish or using crispy rice as a base for elegant appetizers and main courses, understanding the science behind crispness transforms your cooking. The secret isn’t complicated—it’s about controlling moisture, temperature, and timing with precision. Professional chefs have long guarded their techniques for creating perfectly crispy rice that stays crunchy and doesn’t turn soggy or burnt.
This comprehensive guide reveals the professional methods used in top kitchens worldwide, breaking down each step so you can replicate restaurant-quality results in your own kitchen. From selecting the right rice variety to mastering the cooking and crisping techniques, you’ll discover why some rice dishes achieve that coveted golden, crispy exterior while others fall flat. We’ll also explore creative applications, from crispy rice treats to sophisticated plated dishes that showcase this versatile texture.
Understanding Rice Varieties for Maximum Crispness
Not all rice varieties crisp equally. The type of rice you choose fundamentally affects your final results. Short-grain rice contains more amylose, a starch that gelatinizes at higher temperatures, making it ideal for achieving crispness. Medium-grain varieties like arborio or bomba rice also work well because they absorb less water relative to their size. Long-grain jasmine or basmati rice can crisp up beautifully too, but requires slightly different technique due to their lower starch content.
The age of your rice matters significantly. Aged rice, which has been stored for several months or years, contains less moisture and crisps more readily than freshly milled rice. When shopping, look for rice labeled as “aged” or check the packaging date. If using fresh rice, spread it on a baking sheet and air-dry it at room temperature for 24 hours before cooking. This simple preparation step dramatically improves your crispiness potential.
Consider purchasing sushi rice or Japanese short-grain varieties specifically bred for texture. These varieties have been cultivated for centuries to achieve specific textural qualities. You might also explore arborio rice traditionally used in risotto—its high starch content makes it exceptionally crispy when cooked using the techniques outlined below.
The Science Behind Crispy Rice
Understanding what happens at the molecular level helps you execute the technique flawlessly. When rice grains are exposed to dry heat above 212°F (100°C), the moisture inside each grain evaporates. This moisture loss is essential—excess water prevents crispness. Simultaneously, the starches on the rice surface undergo the Maillard reaction, creating golden-brown color and complex flavors.
The key is achieving a moisture content of approximately 10-12% in your finished rice. Raw rice contains about 12-14% moisture. During cooking, rice absorbs water and expands to 15-18% moisture content. To crisp it, you must drive that moisture back down through careful heating. This explains why simply cooking rice normally and hoping it crisps won’t work—you’re starting from the wrong moisture baseline.
Temperature control prevents burning while maximizing crispness. Rice starches begin breaking down around 300°F (150°C) and burn around 350°F (175°C). Professional kitchens maintain precise temperatures between 280-320°F (140-160°C) for optimal crisping without charring. This narrow window requires attention but becomes intuitive with practice.
Step-by-Step Crispy Rice Recipe
Ingredients:
- 2 cups short-grain rice (sushi rice or arborio)
- 3 cups water or stock
- 1 teaspoon salt
- 2 tablespoons neutral oil (vegetable or rice bran oil)
- Optional: butter, garlic, herbs for flavor
Equipment needed:
- Heavy-bottomed saucepan with lid
- Wooden spoon or rice paddle
- Shallow skillet or large frying pan
- Thermometer (optional but helpful)
Step 1: Prepare and Rinse Your Rice
Rinse your rice thoroughly under cold running water until the water runs clear. This removes excess starch on the grain surface, which can trap moisture and prevent crispness. Use your fingers to gently rub the rice grains together while rinsing—this accelerates starch removal. Drain completely in a fine-mesh strainer, letting excess water drip away for several minutes.
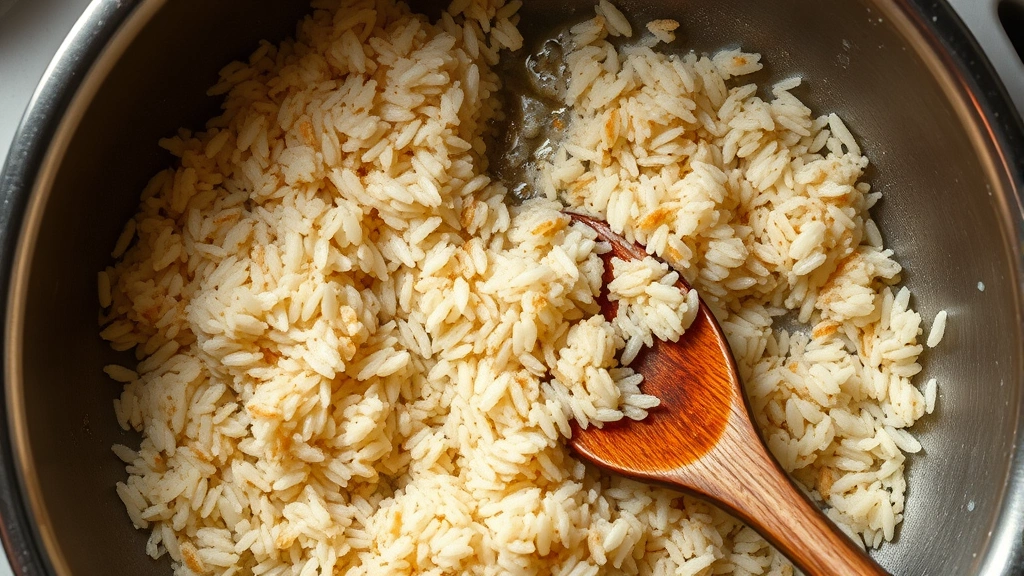
Step 2: Toast the Rice (Optional but Recommended)
Heat your heavy-bottomed saucepan over medium heat for two minutes. Add the rinsed rice and toast for 3-4 minutes, stirring frequently. You’ll hear a subtle popping sound as the grains release moisture. This toasting step reduces the rice’s water absorption capacity and enhances nutty flavors. Watch carefully—you want light golden coloring, not browning.
Step 3: Cook with Precise Water Ratio
Add your water or stock and salt. Bring to a boil over high heat, then reduce to the lowest setting and cover tightly. Cook for exactly 18 minutes without lifting the lid. This timing works for short-grain rice; adjust to 20 minutes for medium grains. The tight lid traps steam, creating the proper cooking environment. After cooking, let the rice rest covered for 5 minutes—this allows residual heat to finish the cooking process evenly.
Step 4: Spread and Cool
Spread the cooked rice on a large baking sheet in a thin, even layer. This cooling step is crucial—it allows the rice to firm up and lose surface moisture. Let it cool at room temperature for 10-15 minutes. You can accelerate this by gently spreading the rice with a fork every few minutes. The rice should feel slightly dry to the touch but not hard.
Step 5: The Crisping Stage
Heat your shallow skillet over medium-high heat. Add oil and let it shimmer. Working in batches, add rice and press gently into the pan without stirring initially. Let it sit for 2-3 minutes until the bottom develops a golden-brown crust. Then stir and continue cooking for another 2-3 minutes, moving the rice around the pan to ensure even crisping.
The rice should make a distinct crackling sound as it crisps—this auditory cue tells you moisture is escaping. You’re aiming for a mix of textures: some individual grains that remain fluffy inside but are crispy outside, plus some clusters of grains that are fully crisped throughout. This textural variety is more interesting than uniform crispness.
Step 6: Season and Serve
Remove from heat and immediately season with salt and any additional flavorings. Butter, roasted garlic, fresh herbs, or soy sauce work beautifully. Serve immediately while the rice is still warm and at peak crispness.
Advanced Techniques Chefs Use
Professional chefs employ several advanced methods to achieve superior results. One technique involves using clarified butter instead of oil for the crisping stage. The higher smoke point of clarified butter allows for higher temperatures, creating more dramatic browning and deeper flavors. This method works particularly well when preparing crispy rice to serve alongside Korean fried chicken recipe or other bold-flavored dishes.
Another professional approach uses the oven-crisping method. After cooling your cooked rice, spread it on a baking sheet and bake at 300°F (150°C) for 15-20 minutes, stirring every 5 minutes. This method offers better temperature control and more consistent results, especially when preparing large quantities. The dry heat of the oven removes moisture more efficiently than stovetop cooking.
Some chefs incorporate flavored stocks during the cooking phase. Vegetable, chicken, or seafood stock adds depth to the final dish. Dashi (Japanese fish stock) creates exceptional umami flavor when used with sushi rice. This technique pairs beautifully with chicken meatballs recipe applications where crispy rice serves as an elegant base.
The double-cooking method represents the pinnacle of crispy rice technique. After the initial cooking and cooling, chefs refrigerate the rice for several hours or overnight. Cold rice has lost additional surface moisture and firms up considerably. When crisped the next day, it achieves maximum crunchiness. This explains why leftover rice crisps so beautifully—the extended cooling period is actually advantageous.
Professional kitchens also use seasoned rice bran oil for crisping. This specialty oil, infused with aromatics like garlic, ginger, or chili, imparts flavor while preventing oxidation. You can create your own by gently heating neutral oil with aromatics, straining, and cooling before use.
Creative Applications and Serving Ideas
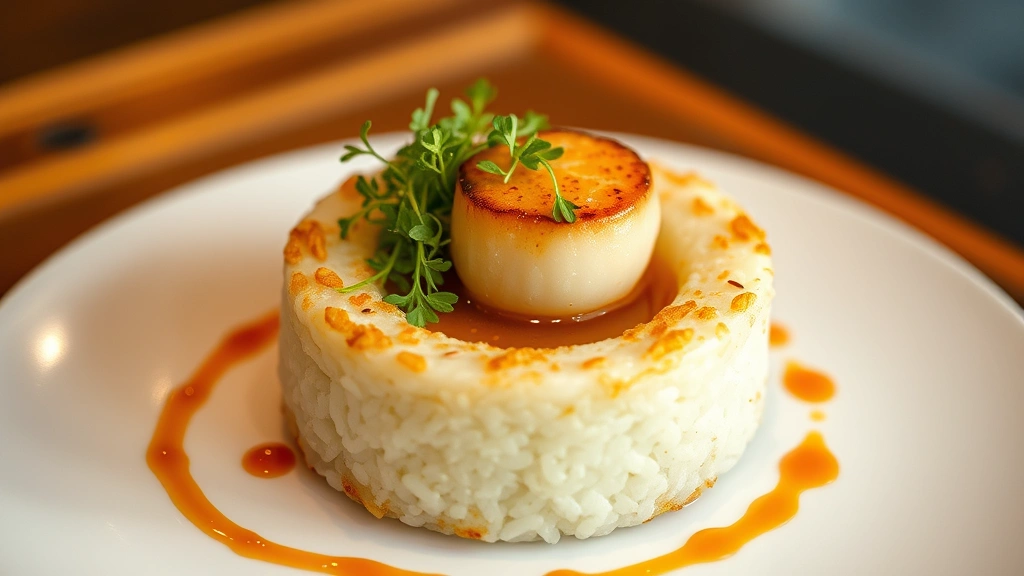
Crispy rice transforms into countless elegant presentations. Create crispy rice cakes by pressing warm, freshly crisped rice into ring molds while still warm and pliable. These stunning cylinders become the foundation for plated appetizers or main courses. Top with seared scallops, cured fish, or delicate vegetables for restaurant-quality presentations.
Combine crispy rice with bound ingredients for dimensional dishes. Mix crispy rice with creamy risotto-style preparations for textural contrast. Or create rice croquettes by combining cooked rice with cheese, egg, and seasonings, forming into patties, and pan-frying until golden. These pair wonderfully alongside low carb dinner recipes for added substance.
Use crispy rice as an unexpected textural component in composed dishes. Scatter crispy rice clusters over creamy soups for textural contrast. Layer it into grain bowls with vegetables, proteins, and sauce. Incorporate it into salads where it adds crunch similar to croutons but with more sophisticated flavor.
For breakfast applications, explore crispy rice with sweet elements. Toss warm crispy rice with melted chocolate and nuts for a sophisticated treat. Or create a breakfast bowl with crispy rice, yogurt, fresh fruit, and granola—the crispy rice adds unexpected texture that elevates the entire dish. This concept aligns beautifully with easy vegan breakfast ideas where crispy rice provides protein and substance.
Advanced applications include crispy rice powder. Grind completely crisped rice in a food processor to create a seasoning powder. Dust this over finished dishes for visual appeal and textural interest. It’s particularly effective over creamy dishes where it prevents visual monotony.
Troubleshooting Common Problems
Problem: Rice is soggy instead of crispy
Solution: You likely didn’t cool the rice sufficiently before crisping. The cooked rice must reach room temperature and feel dry to the touch. Additionally, ensure your pan is hot enough—oil should shimmer noticeably before adding rice. Some cooks find that spreading rice on a sheet pan in the oven at 250°F (120°C) for 10 minutes before the final crisping stage helps eliminate stubborn moisture.
Problem: Rice is burnt or tastes bitter
Solution: Your heat is too high. Reduce to medium or medium-high and work in smaller batches. The rice should sizzle gently, not violently. Additionally, watch your timing closely—once the rice develops golden color, remove it immediately. Burnt flavor develops quickly once browning begins, so vigilance is essential.
Problem: Rice clusters together instead of separating into individual grains
Solution: Your rice has too much residual moisture or starch. Ensure thorough rinsing before cooking. Try the oven-crisping method instead, which provides better moisture control. Some chefs add a small amount of oil to the cooked rice before cooling, which prevents clumping while promoting crispness.
Problem: Inconsistent results between batches
Solution: Temperature fluctuations are likely culpable. Use a cooking thermometer to monitor your pan temperature, aiming for 300-320°F (150-160°C). Also ensure your rice is spread evenly before cooling—thicker areas retain more moisture. Finally, use aged rice consistently rather than mixing fresh and aged varieties, as they crisp differently.
Problem: Rice loses crispness quickly after cooking
Solution: This indicates residual moisture. Try the refrigeration method—cool completely, refrigerate overnight, then crisp just before serving. Alternatively, store finished crispy rice in an airtight container with uncooked rice or silica packets to absorb any ambient moisture.
FAQ
Can I make crispy rice ahead of time?
Partially. Cook and cool your rice ahead—this can be done the day before. However, crisp it immediately before serving for maximum texture. If you must prepare ahead, store in an airtight container and refresh briefly in a 300°F oven for 3-5 minutes before serving.
What’s the difference between crispy rice and fried rice?
Fried rice involves cooking rice with oil, vegetables, and proteins in a wok or large pan, incorporating ingredients throughout. Crispy rice focuses solely on achieving crispy texture—it’s a technique rather than a complete dish. You can apply crispy rice techniques to fried rice for added textural dimension.
Does brown rice crisp as well as white rice?
Brown rice crisps adequately but requires longer cooking times and slightly different techniques. Brown rice’s bran layer contains oils that can cause uneven browning. Use the oven-crisping method for more consistent results with brown rice varieties.
Can I use a rice cooker to prepare rice for crisping?
Yes, rice cookers work well for the initial cooking phase. Follow your cooker’s standard instructions, then proceed with cooling and crisping stages. Some rice cookers have a “keep warm” setting that can even accelerate moisture removal.
What oils work best for crisping?
Neutral oils with high smoke points work best: vegetable oil, rice bran oil, avocado oil, or clarified butter. Avoid olive oil and coconut oil, which have lower smoke points and can burn. Sesame oil burns easily but works in small quantities mixed with neutral oil for flavor.
How do I store crispy rice?
Store in airtight containers with moisture-absorbing packets. Crispy rice stays fresh for 2-3 days when properly stored. Humidity is the enemy—keep away from steam and moisture sources. Refresh briefly in the oven before serving if crispness diminishes.
Can I make crispy rice with wild rice or other grains?
Absolutely. Wild rice, farro, barley, and other grains respond beautifully to these techniques. Adjust cooking times based on grain type—wild rice typically requires 45 minutes, while farro needs about 30 minutes. The crisping technique remains identical.
Is crispy rice gluten-free?
Yes, when using pure rice varieties. Most white, brown, and specialty rice varieties are naturally gluten-free. Always verify packaging to ensure no cross-contamination during processing. When using other grains, verify their gluten-free status separately.
How does crispy rice pair with different cuisines?
Crispy rice works across culinary traditions. It’s essential in Asian cuisines, pairs beautifully with Latin American flavors when seasoned with cilantro and lime, complements Mediterranean dishes with herbs and olive oil, and adds elegance to contemporary French-influenced plating. The technique is universally applicable.
What’s the nutritional impact of the crisping process?
Crisping removes moisture but doesn’t significantly alter nutritional content. The oil used for crisping adds calories—typically 50-100 additional calories per serving depending on amount used. The primary nutritional composition of carbohydrates and trace minerals remains unchanged.


