Ultimate Duck Breast Dish: Chef’s Favorite Recipe
Duck breast represents one of the most elegant and versatile proteins in modern cooking, offering a rich, distinctive flavor that elevates any dinner table. Unlike chicken or turkey, duck breast delivers a deep, almost beefy taste with a luxurious fat layer that renders into crispy perfection when prepared correctly. This chef-favorite recipe transforms a simple duck breast into a restaurant-quality dish that impresses guests while remaining surprisingly approachable for home cooks.
The secret to mastering duck breast lies in understanding its unique structure: the meat itself is lean and dense, similar to red meat, while the skin contains significant fat that requires specific technique to achieve that coveted crispness. Whether you’re planning an intimate dinner party or exploring new cooking techniques, this guide walks you through every step of creating a perfectly executed duck breast dish that rivals your favorite fine dining establishment.
Selecting and Preparing Your Duck Breast
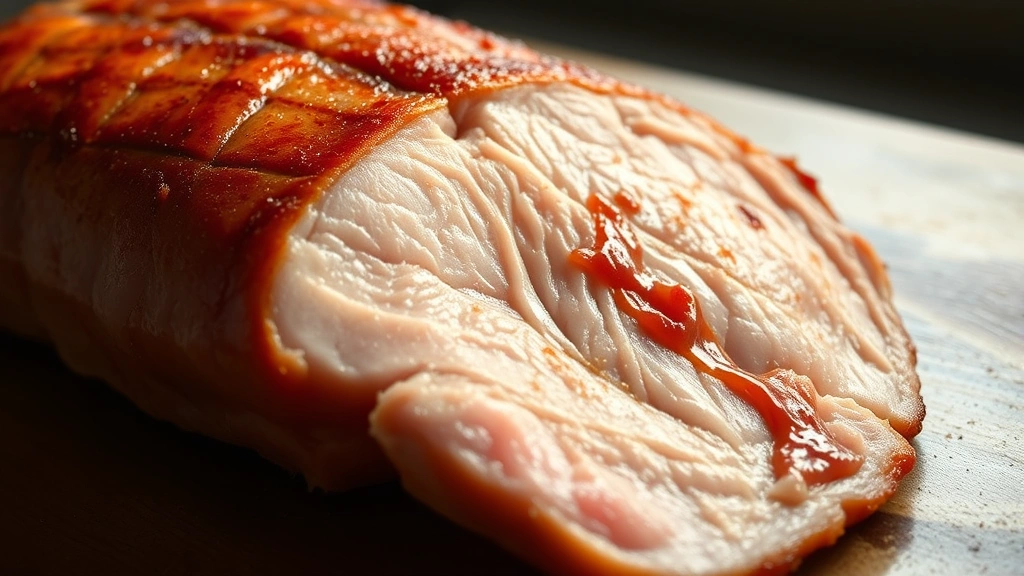
The foundation of an exceptional duck breast dish begins with selecting quality poultry. Look for duck breasts with smooth, unblemished skin and a vibrant color ranging from pale to medium pink. The meat should feel firm to the touch, and the fat layer should be approximately one-quarter inch thick. Magret duck, sourced from force-fed ducks raised for foie gras production, offers premium quality with superior fat content, though regular farm-raised duck breasts work beautifully as well.
When purchasing, plan for one large duck breast per person, as they typically weigh between 6 to 8 ounces each. Avoid breasts that appear excessively wet or have any off-putting odor. If buying frozen, allow 24 hours for proper thawing in your refrigerator, never at room temperature, to maintain food safety and texture integrity.
Preparation begins at least one hour before cooking. Remove your duck breasts from the refrigerator and pat them completely dry with paper towels. Moisture is the enemy of crispy skin, so take time to thoroughly dry every surface. If you have time, leaving the breasts uncovered on a plate in the refrigerator for several hours further promotes moisture evaporation and skin crisping. Season both sides generously with kosher salt and freshly ground black pepper, allowing the salt to penetrate the meat for enhanced flavor development.
Essential Equipment and Ingredients
Successfully executing this duck breast recipe requires specific tools and quality ingredients. For equipment, invest in a sharp knife (at least 8 inches for clean slicing), a heavy-bottomed stainless steel or cast-iron skillet, a meat thermometer for precise doneness, and a cutting board with grooves to capture juices. A kitchen scale ensures consistent portion sizing, while a resting rack allows air circulation beneath the cooked breast.
Core ingredients for the main dish include:
- Duck breasts (preferably Magret quality)
- Kosher salt and freshly ground black pepper
- Optional: fresh thyme, rosemary, or garlic
- Neutral oil with high smoke point (optional, though usually unnecessary)
For complementary components, consider ingredients for sauces and sides. A homemade salad dressing can accompany a fresh greens course, while horseradish sauce provides a sharp counterpoint to rich duck meat. Many chefs also appreciate cocktail sauce variations with Asian influences for modern presentations.
The Scoring Technique
Scoring the duck skin is the most critical step for achieving restaurant-quality crispness. This technique involves making shallow cuts through the fat layer without penetrating the meat beneath. Using a sharp knife, hold it at a 45-degree angle and make parallel cuts approximately one-quarter inch apart, running in one direction across the entire breast surface. Then make another series of cuts at a 45-degree angle in the opposite direction, creating a crosshatch pattern.
The depth of your cuts matters tremendously. You want to cut through the fat layer completely while barely kissing the meat surface—cutting too deeply risks damaging the breast and allowing juices to escape, while shallow cuts fail to render the fat properly. Practice on your first breast to develop the right feel. Many professional chefs score their duck breasts in a diagonal pattern rather than crosshatch, which is equally effective; choose whichever pattern you find most comfortable.
After scoring, return the breast to the refrigerator for at least 15 minutes. This allows the cuts to set and helps the skin separate from the meat during cooking. Some chefs prefer scoring immediately before cooking, so experiment to find your preference. The key is ensuring your knife is sharp enough to glide through the fat without tearing—a dull blade creates ragged edges that won’t crisp as effectively.
Cooking Methods: Pan-Seared Perfection
The pan-sear method represents the most accessible and reliable approach for home cooks, delivering results comparable to professional kitchens. Begin by placing your scored and seasoned duck breast skin-side down in a cold skillet. This critical detail—starting with a cold pan—allows the fat to render gradually and evenly, preventing the skin from sticking or cooking too quickly.
Turn the heat to medium, resisting any urge to increase temperature. As the pan warms, you’ll notice fat rendering from beneath the skin, creating a natural cooking medium. This process takes approximately 8 to 12 minutes and requires patience. Occasionally tilt the pan to distribute rendered fat evenly. You’ll hear gentle sizzling, but aggressive popping indicates excessive heat; reduce temperature accordingly.
Your goal is skin that transforms from pale to deep golden brown and crackles when you press it gently with tongs. Use a meat thermometer inserted horizontally into the thickest part of the meat to monitor internal temperature. For medium-rare (the recommended doneness for duck), aim for 130 to 135°F. Once the skin reaches desired color and the thermometer reads 125°F, flip the breast and sear the meat side for 1 to 2 minutes at medium-high heat to develop color and finish cooking.
If your duck breast is particularly thick, you can finish cooking in a 400°F oven for 3 to 5 minutes after searing the meat side, which ensures even cooking throughout without overcooking the exterior. This hybrid method proves especially useful for breasts larger than 7 ounces.
Cooking times vary based on breast size and your specific stovetop, typically ranging from 12 to 18 minutes total. The thickness of your duck breast and your preferred doneness level significantly impact timing. Many home cooks find that medium-rare offers the best balance of tenderness and flavor, as it preserves the meat’s natural juiciness while the exterior develops proper color and texture.
Resting and Slicing for Maximum Tenderness
Once your duck breast reaches the correct internal temperature, remove it from the heat immediately. This is where many home cooks falter by cutting into the meat right away. Resting is absolutely essential and non-negotiable. Transfer the breast to a warm plate and allow it to rest for 5 to 8 minutes, loosely tented with foil if desired. During this time, carryover cooking adds another 2 to 3°F to the internal temperature while muscle fibers relax and reabsorb juices that escaped during cooking.
While your duck rests, you can prepare accompanying elements. Reheat any sauces, finish side dishes, or plate components. The resting period also allows you to make final seasoning adjustments to complementary elements.
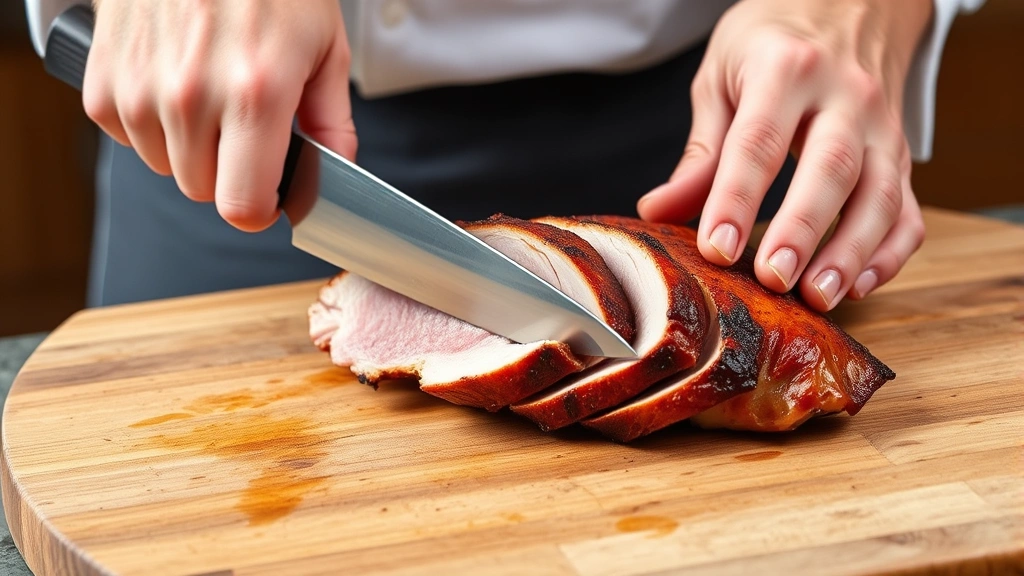
Slicing technique dramatically affects the eating experience. Using a very sharp knife, slice the breast against the grain at a slight angle, creating pieces approximately one-quarter inch thick. The angled cut increases surface area, making each piece appear more generous while allowing sauce or pan juices to coat the meat. Arrange slices slightly overlapping on a warm plate to showcase the beautiful rosy interior and crispy exterior.
If your duck breast appears too rare after slicing, don’t panic. Return the slices to the warm skillet for 30 seconds per side, or place them on a warm plate in a 350°F oven for 2 to 3 minutes. This brief additional cooking won’t dry out the meat and will bring the internal temperature to your preference.
Sauce Pairings and Accompaniments
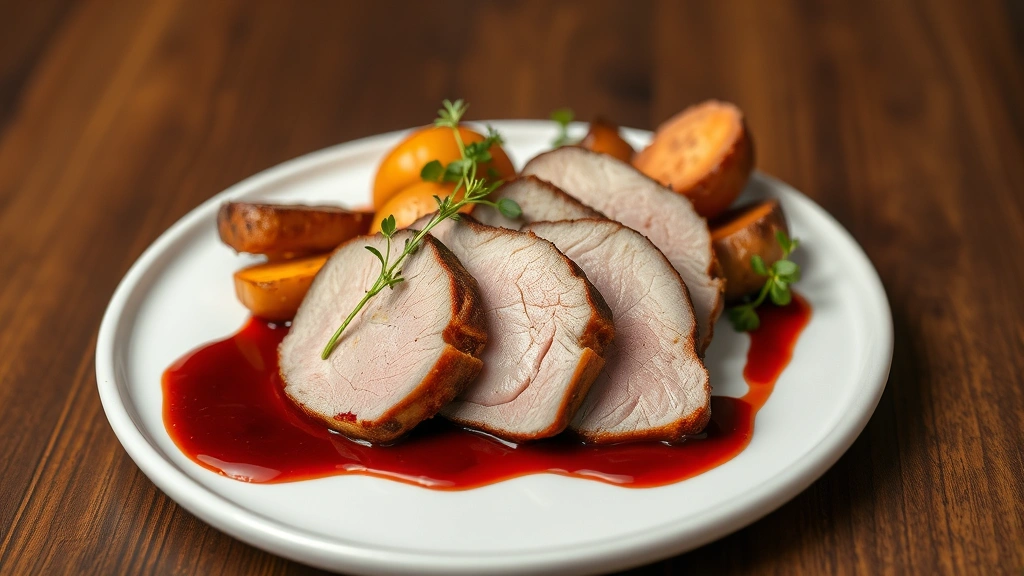
The rich, distinctive flavor of duck breast pairs beautifully with both classic and innovative sauces. A cherry gastrique—made by reducing cherry juice with vinegar and stock—offers fruity acidity that cuts through the meat’s richness. Orange sauce provides citrus brightness, while a red wine reduction adds depth and sophistication. For Asian-inspired preparations, consider a Serious Eats-style hoisin and five-spice glaze that complements duck’s bold flavor.
The pan itself provides a foundation for sauce-making. After removing the duck, pour off excess fat (reserving 1 tablespoon), then deglaze with red wine, duck stock, or brandy, scraping the browned bits from the pan bottom. Reduce this liquid by half, whisk in cold butter for silkiness, and finish with fresh herbs. This pan sauce requires merely 3 to 4 minutes and captures all the flavorful browned bits from cooking.
Side dish selections should complement rather than compete with duck’s assertive flavor. Root vegetables like parsnips, carrots, or potatoes roasted until caramelized provide textural contrast. A simple green salad with acid-forward vinaigrette cleanses the palate between bites. Polenta, risotto, or creamed spinach offer luxurious, complementary textures. Consider how your chosen sides relate to your sauce selection—Asian flavors pair with jasmine rice and bok choy, while French preparations suit potato gratin and haricots verts.
Common Mistakes to Avoid
Understanding frequent pitfalls helps ensure success with your duck breast preparation. The most common error is starting with inadequate dryness on the skin surface. If your duck skin fails to crisp properly, the culprit is usually moisture. Ensure your paper towels thoroughly dry every surface, and allow adequate refrigeration time for surface moisture to evaporate naturally.
Overcooking represents the second major mistake. Duck meat becomes tough and unpleasant when cooked beyond medium. Many home cooks, conditioned by poultry safety guidelines, cook duck to 165°F as they would chicken. Duck, however, has different bacterial concerns than chicken and is safe at 130 to 135°F internal temperature when sourced from reputable suppliers. Using a reliable meat thermometer eliminates guesswork.
Starting with a hot pan is another frequent error. A cold-pan start allows fat to render gradually and skin to develop even color. A hot pan causes the skin to seize and contract, preventing proper rendering and resulting in a tough, unappetizing texture.
Skipping the resting period compromises texture and juiciness. Even 5 minutes makes a dramatic difference in how the meat retains its flavorful juices. Finally, avoid cutting into the duck immediately to check doneness. This releases precious juices and compromises the final presentation. Trust your thermometer instead.
Comparing duck breast to other protein preparations helps contextualize technique. The grilling method for steak shares similarities with duck in temperature management, while chuck steak recipes offer insights into rendering tough cuts. Even ribeye roast preparation provides useful temperature and resting guidance applicable to duck cookery.
FAQ
What is the ideal internal temperature for duck breast?
Medium-rare duck breast reaches peak flavor and texture at 130 to 135°F internal temperature. This temperature allows the meat to remain juicy and tender while ensuring food safety when duck sourced from reputable suppliers. Use a reliable meat thermometer inserted horizontally into the thickest portion of the meat for accurate readings.
Can I cook duck breast in the oven instead of pan-searing?
Yes, though pan-searing produces superior skin crispness. To roast duck breast, sear it skin-side down in a hot oven-safe skillet for 4 to 5 minutes until skin crisps, then flip and transfer to a 400°F oven for 5 to 8 minutes until the internal temperature reaches 130 to 135°F. This hybrid method combines skin crispness with even cooking throughout the meat.
How do I store leftover duck breast?
Refrigerate leftover duck breast in an airtight container for up to 3 days. Reheat gently at 325°F for 5 to 7 minutes to avoid drying the meat. Cold duck breast also makes excellent salad additions or can be shredded for Asian noodle dishes.
Why is my duck skin not crispy?
Inadequate drying before cooking causes soft skin. Thoroughly pat the duck dry with paper towels and allow uncovered refrigeration for several hours before cooking. Ensure you start in a cold pan and maintain medium heat throughout rendering. If skin still fails to crisp, your heat may be too high, causing the exterior to brown before fat renders completely.
What’s the difference between Magret and regular duck breast?
Magret duck comes from force-fed ducks raised specifically for foie gras production, resulting in significantly thicker fat layers and larger breasts. Regular farm-raised duck breasts are smaller with less fat but offer excellent flavor at a lower price point. Both cook beautifully using this recipe; adjust timing slightly for size differences.
Can I freeze duck breast?
Yes, duck breast freezes well for up to 3 months when wrapped tightly in plastic wrap and placed in freezer bags. Thaw slowly in the refrigerator for 24 hours before cooking. Frozen duck develops ice crystals that can affect texture slightly, but properly thawed breast remains excellent quality.
What wine pairs well with duck breast?
Duck’s rich flavor complements medium-bodied red wines like Pinot Noir, Côtes du Rhône, or lighter Bordeaux blends. Alsatian whites, particularly Riesling or Gewürztraminer, offer an elegant alternative. Avoid heavy, high-tannin wines that can clash with duck’s distinctive flavor profile.
How do I achieve even cooking with thick duck breasts?
Sear the skin side in a cold pan for 10 to 12 minutes, then flip and sear the meat side for 1 to 2 minutes before finishing in a 400°F oven for 3 to 5 minutes. This hybrid method prevents the exterior from overcooking while ensuring the thick interior reaches proper doneness. Monitor with a meat thermometer to avoid guesswork.


