Grandma’s Secret Lemon Loaf Recipe: A Citrus Masterpiece
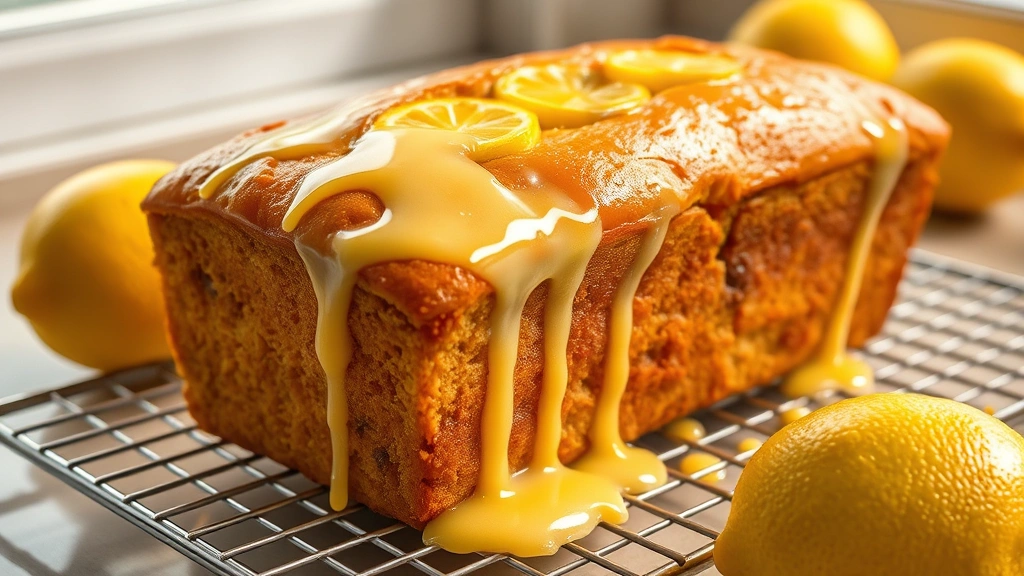
There’s something magical about biting into a slice of tender, moist lemon loaf that transports you straight to your grandmother’s kitchen. This beloved classic combines the bright, zesty flavor of fresh lemons with a delicate crumb structure that keeps people coming back for more. My grandmother guarded this recipe like treasure for decades, and now I’m thrilled to share her time-tested secrets with you.
What makes this lemon loaf recipe truly special isn’t just the quality ingredients—it’s the technique and little tricks that ensure perfect results every single time. From selecting the right lemons to achieving that signature tender texture, every step matters. Whether you’re baking for a special occasion, preparing a gift for someone you love, or simply craving a slice with your morning coffee, this recipe delivers consistent, restaurant-quality results that will have everyone asking for your secret.
Essential Ingredients for the Perfect Lemon Loaf
The foundation of any great lemon loaf starts with quality ingredients. Grandma always said that you can’t make something delicious from mediocre components, and she was absolutely right. Here’s exactly what you’ll need:
- All-purpose flour: 1¾ cups (220g)—the backbone of your loaf’s structure
- Baking powder: 1½ teaspoons—ensures proper rise and lightness
- Sea salt: ¼ teaspoon—enhances flavor complexity
- Unsalted butter: ½ cup (115g), softened—creates richness and moisture
- Granulated sugar: 1 cup (200g)—sweetness and tender crumb
- Eggs: 2 large, room temperature—binds ingredients and adds structure
- Fresh lemon juice: ¼ cup (60ml)—the star ingredient
- Lemon zest: 2 tablespoons (from 2-3 fresh lemons)—concentrated flavor
- Plain Greek yogurt: ½ cup (120g)—creates incredible moisture and tenderness
- Vanilla extract: 1 teaspoon—rounds out flavors
For the glaze, you’ll need 1 cup powdered sugar, 2-3 tablespoons fresh lemon juice, and a pinch of sea salt. The quality of your lemons truly matters here—choose firm, bright yellow fruits that feel heavy for their size, as they contain more juice and oils.
Step-by-Step Preparation: Setting Up for Success
Before you start mixing anything, proper preparation ensures your baking experience runs smoothly. This is where Grandma’s organizational skills came into play.
Preheat and prepare your pan: Start by preheating your oven to 350°F (175°C). Grease a standard loaf pan (9×5 inches) thoroughly with butter or cooking spray, then line the bottom with parchment paper. This two-step approach prevents sticking while making removal effortless. Grandma always said that a well-prepared pan is half the battle won.
Prepare your dry ingredients: Whisk together flour, baking powder, and sea salt in a medium bowl. This combination ensures even distribution of the leavening agent, preventing dense pockets in your finished loaf. Set this mixture aside.
Zest and juice your lemons: Using a microplane zester, carefully remove the bright yellow zest from your lemons—avoid the bitter white pith beneath. You should have approximately 2 tablespoons of zest. Cut your lemons in half and juice them thoroughly, straining out any seeds. You need ¼ cup of juice for the batter plus additional juice for the glaze.
Bring ingredients to room temperature: This step is crucial for achieving the best texture. Remove butter and eggs from the refrigerator 30 minutes before baking. Room-temperature ingredients emulsify better, creating a smoother batter and more tender final product. Greek yogurt should also reach room temperature.
Baking Instructions: Creating the Perfect Crumb
Now comes the exciting part—bringing this recipe together. Follow these steps precisely for the most reliable results.
Cream the butter and sugar: In a large mixing bowl, combine softened butter and granulated sugar. Using an electric mixer on medium speed, beat for 3-4 minutes until the mixture becomes pale, fluffy, and nearly doubles in volume. This process incorporates air into the batter, creating lift and a tender crumb. You’ll know it’s ready when it looks like fluffy clouds.
Incorporate eggs and flavorings: Add eggs one at a time, beating well after each addition. Scrape down the bowl between additions to ensure even mixing. Once both eggs are incorporated, add vanilla extract and lemon zest, beating until fully combined. The mixture should look smooth and slightly lighter in color.
Alternate wet and dry ingredients: Here’s where technique truly matters. Add one-third of your dry ingredient mixture to the butter mixture, stirring on low speed just until combined. Add half of your Greek yogurt and half of your lemon juice, stirring gently. Repeat with another third of the dry mixture, then the remaining yogurt and lemon juice. Finally, add the last third of dry ingredients, stirring until just combined. Do not overmix—overmixing develops gluten, resulting in a tough, dense loaf. A few small flour streaks are perfectly fine.
Transfer to prepared pan: Pour the batter into your prepared loaf pan, smoothing the top with a spatula. Tap the pan gently on the counter a few times to release any air pockets. For an even bake, try to create a slight indentation down the center of the batter—this helps the loaf rise evenly.
Bake with precision: Place in the preheated 350°F oven and bake for 50-55 minutes. The loaf is done when a toothpick inserted into the center comes out with just a few moist crumbs (not wet batter). The top should be golden brown and spring back when lightly touched. Grandma’s secret here: if your loaf is browning too quickly, tent it loosely with aluminum foil for the last 15 minutes.
Cool properly: Allow the loaf to cool in the pan for 15 minutes before turning out onto a wire rack. This resting period allows the structure to set slightly, preventing crumbling. Complete cooling takes approximately 2 hours before glazing.
Making the Perfect Lemon Glaze
The glaze transforms a good lemon loaf into an exceptional one. This simple mixture adds moisture, sweetness, and that signature glossy finish.
Combine glaze ingredients: In a small bowl, whisk together 1 cup powdered sugar, 2-3 tablespoons fresh lemon juice, and a tiny pinch of sea salt. Start with 2 tablespoons of juice and add more gradually until you reach your desired consistency. The glaze should be thick enough to coat a spoon but thin enough to drizzle smoothly. If it becomes too thin, add more powdered sugar; if too thick, add lemon juice by the teaspoon.
Apply the glaze: Once your loaf has cooled completely, drizzle the glaze over the top, allowing it to cascade down the sides naturally. For a more polished appearance, use the back of a spoon to spread it evenly. Allow the glaze to set for 30 minutes before slicing. This creates a beautiful candied exterior that catches the light beautifully.
If you’re looking for complementary treats, consider pairing this with best breakfast food recipes for a complete morning spread, or explore ice cream recipe options for a delightful dessert pairing.
Grandma’s Pro Tips for Guaranteed Success
Select the perfect lemons: Meyer lemons are sweeter than regular Eureka lemons and work beautifully in this recipe. However, standard supermarket lemons work perfectly fine. The key is freshness—older lemons have less juice and less vibrant flavor.
Room temperature is non-negotiable: This cannot be overstated. Cold ingredients don’t incorporate smoothly, leading to a dense, heavy loaf. Patience here pays dividends.
Don’t skip the Greek yogurt: This ingredient is Grandma’s secret weapon. It adds moisture and tang that keeps the loaf tender for days while creating a subtle depth of flavor that regular milk or buttermilk cannot achieve. It’s the difference between a good loaf and a truly memorable lemon loaf recipe.
Invest in quality baking tools: A reliable oven thermometer ensures accurate temperature, while a microplane zester makes lemon zest infinitely easier than a box grater. These tools make the process more enjoyable and produce better results.
The toothpick test matters: Overbaking creates dryness, while underbaking leaves the center gummy. That perfect middle ground—where a toothpick comes out with just a few moist crumbs—is your target. Every oven bakes differently, so start checking at 48 minutes.
Let flavors develop overnight: While this loaf is delicious fresh, the flavors truly blossom after sitting overnight. The lemon flavor intensifies, and the texture becomes even more tender. If you can wait, you’ll be rewarded.
Storage and Serving Recommendations
Proper storage extends the life of your lemon loaf and maintains its quality.
Room temperature storage: Wrapped tightly in plastic wrap or stored in an airtight container, your lemon loaf keeps at room temperature for 3-4 days. The glaze hardens slightly, creating a pleasant texture contrast with the tender crumb.
Refrigerator storage: For extended storage, wrap the cooled loaf tightly and refrigerate for up to one week. Cold storage actually helps maintain moisture and keeps the loaf fresh longer.
Freezing for later: Wrap the unglazed loaf tightly in plastic wrap, then aluminum foil, and freeze for up to three months. Thaw at room temperature for 2-3 hours before glazing. The quality remains excellent when properly frozen.
Serving suggestions: Serve slices at room temperature with afternoon tea or coffee. A dollop of whipped cream or Greek yogurt makes a delightful accompaniment. For breakfast, pair with best healthy food recipes for a balanced meal. The tartness of lemon also pairs beautifully with rich savory components, making it surprisingly versatile.

Creative Variations to Explore
Lemon poppy seed version: Add 2 tablespoons of poppy seeds to your dry ingredients. This creates a pleasant textural contrast and is a classic combination that Grandma occasionally prepared for special occasions.
Lemon blueberry loaf: Fold ¾ cup of fresh or frozen blueberries into your batter just before pouring into the pan. The tartness of lemon complements berry sweetness beautifully. If using frozen berries, don’t thaw them first—this prevents them from sinking.
Lemon lavender version: Add ½ teaspoon of culinary lavender (finely ground) to your dry ingredients for a sophisticated floral note. This variation is particularly popular for afternoon tea service.
Lemon ricotta cake: Substitute Greek yogurt with whole milk ricotta cheese for a slightly denser, richer texture. This variation is closer to Italian baking traditions and creates a more decadent loaf.
Mini lemon loaves: Divide batter among a muffin tin and bake for 22-25 minutes instead. This creates charming individual portions perfect for gifting or portion control. The shorter baking time means you’ll need to start checking around 18 minutes.
For additional inspiration, explore summer salad recipes to complement your lemon loaf for a complete refreshing menu.
FAQ
Why is my lemon loaf dense and heavy?
Dense texture typically results from overmixing the batter, which develops gluten and traps air escape. Mix only until ingredients are just combined. Also verify your oven temperature is accurate—too-low heat can create dense crumbs. Finally, ensure baking powder is fresh (replace every 6 months) and that you’re measuring flour correctly by spooning and leveling, not scooping directly from the bag.
Can I use bottled lemon juice instead of fresh?
While possible, fresh lemon juice produces superior flavor and a brighter taste. Bottled juice contains preservatives that can affect the final flavor profile. However, in a pinch, bottled juice works—just expect a slightly less vibrant lemon taste. Never use artificial lemon flavoring, as it creates an unpleasant chemical aftertaste.
How do I prevent a crack down the center of my loaf?
That characteristic crack is actually desirable and normal in loaf cakes—it’s a sign of proper rising. However, if you prefer a smoother top, create a slight indentation down the center of your batter before baking, or place a piece of aluminum foil tent over the loaf during the first 25 minutes of baking.
What’s the best way to gift this loaf?
Wrap the cooled, glazed loaf in parchment paper, then place in a decorative box or tin. Include a label with the baking date and storage instructions. This loaf makes an exceptionally thoughtful homemade gift that impresses far more than store-bought options. For special occasions, pair with foods rich in antioxidants information for a wellness-focused gift presentation.
Can I reduce the sugar in this recipe?
You can reduce sugar to ¾ cup if desired, though this will affect sweetness and texture slightly. The sugar contributes to moisture and browning, so reducing it too much results in a drier loaf. Don’t reduce below ¾ cup, as this compromises the recipe’s integrity. The lemon flavor actually shines more with slightly less sugar, so this adjustment works well for those preferring less sweetness.
How do I know when my loaf is perfectly done?
The best indicator is the toothpick test—insert a toothpick into the center and it should come out with just a few moist crumbs, not wet batter. The top should be golden brown, and the loaf should spring back when lightly touched. Don’t rely solely on baking time, as ovens vary. Start checking at 48 minutes and continue every 2 minutes until done.
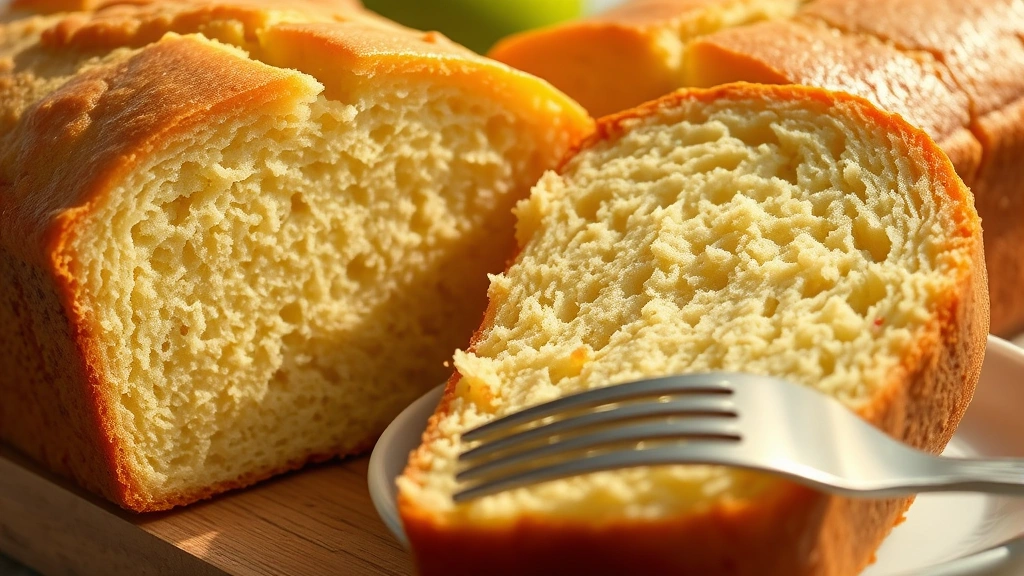
What’s the difference between this loaf and a cake?
Loaf cakes, like this lemon version, have a denser crumb than traditional cakes due to lower liquid content and less leavening. They’re designed to slice cleanly and maintain their shape, making them perfect for serving individual portions. The texture is more uniform throughout, and they keep longer than traditional frosted cakes. This lemon loaf recipe sits beautifully in that sweet spot between bread and cake.


