Best Homemade Ice Cream? Tried & True Method
Making ice cream at home transforms a simple dessert into a culinary masterpiece. Unlike store-bought versions loaded with stabilizers and artificial flavors, homemade ice cream delivers pure, creamy indulgence with ingredients you actually recognize. The secret lies not in complicated techniques but in understanding the science behind emulsification, freezing, and proper churning.
This tried-and-true method has been perfected over decades by home cooks and professional pastry chefs alike. Whether you own an ice cream maker or plan to invest in one, you’ll discover that creating frozen desserts at home is more accessible than you might think. The result? Silky, dense ice cream that rivals premium artisanal brands—all made in your own kitchen.
Understanding Ice Cream Science
Ice cream is fundamentally an emulsion—a suspension of fat droplets in a water-based liquid, stabilized by proteins and emulsifiers. This structure creates the smooth, creamy texture that distinguishes quality ice cream from frozen desserts. When you combine cream, milk, and egg yolks, you’re creating the perfect environment for this emulsion to thrive.
The fat content plays a crucial role in mouthfeel and flavor perception. Full-fat cream contributes richness, while milk provides lightness. Egg yolks serve a dual purpose: they contain lecithin, a natural emulsifier that helps stabilize the mixture, and they add velvety texture through their fat content. Understanding this chemistry helps you manipulate recipes to achieve your desired consistency.
Temperature control is equally important. Heating the custard base to 160°F (71°C) pasteurizes it, eliminating potential pathogens while cooking the egg proteins slightly, which actually improves texture. Chilling the base thoroughly before churning is essential—a cold mixture churns more efficiently, incorporating air evenly and preventing excessive ice crystal formation.
Air incorporation during churning determines whether your ice cream feels dense or fluffy. Proper churning creates tiny air pockets throughout the mixture, increasing volume while maintaining creaminess. Under-churned ice cream becomes icy; over-churned ice cream becomes grainy and butter-like. The sweet spot occurs when the mixture reaches soft-serve consistency.
Essential Ingredients and Equipment
The foundation of excellent homemade ice cream rests on quality ingredients. You’ll need heavy cream, whole milk, sugar, egg yolks, and vanilla extract at minimum. Source the best cream you can find—it should contain only cream and perhaps a stabilizer like guar gum, nothing more. Whole milk adds body without excessive richness. Use large, fresh egg yolks from pastured hens if possible; they contribute superior flavor and natural golden color.
Sugar serves multiple functions beyond sweetness. It lowers the freezing point of the mixture, preventing rock-hard ice cream and allowing proper scooping. Typically, you’ll use between 3/4 to 1 cup sugar per quart of ice cream. Some recipes incorporate corn syrup or glucose, which further improves texture by interfering with ice crystal formation.
Equipment choices significantly impact results. An ice cream maker with a pre-frozen bowl is the gold standard—these machines churn while simultaneously freezing. Dasher-style makers work excellently for home use. If you lack an ice cream maker, the hand-stirring method works but requires more effort and produces slightly less smooth results.
You’ll also need basic kitchen tools: a heavy-bottomed saucepan, whisk, instant-read thermometer, fine-mesh strainer, and shallow freezer-safe containers. A thermometer prevents guesswork when heating your custard base. A strainer removes any accidentally cooked egg bits, ensuring silky texture.
Classic Vanilla Ice Cream Base
This foundational recipe yields approximately one quart of ice cream—enough for four to six servings. The technique applies to virtually all ice cream variations, making it essential to master.
Ingredients:
- 2 cups heavy cream
- 1 cup whole milk
- 3/4 cup granulated sugar
- 5 large egg yolks
- 1 tablespoon vanilla extract (or 1 vanilla bean, split and scraped)
- 1/4 teaspoon sea salt
Step 1: Combine Cream and Milk
Pour two cups heavy cream and one cup whole milk into your heavy-bottomed saucepan. Heat over medium heat, stirring occasionally, until small bubbles form around the edges—approximately 160°F (71°C). You’re not boiling; you’re gently heating to pasteurize the dairy.
Step 2: Prepare Egg Yolks
While the dairy heats, whisk five egg yolks with three-quarters cup sugar in a separate bowl. Whisk for two to three minutes until the mixture becomes pale and slightly thickened. This process, called “ribboning,” incorporates air and helps the eggs cook evenly when you add hot cream.
Step 3: Temper the Eggs
This critical step prevents scrambled eggs in your ice cream. Slowly ladle one cup of the hot cream mixture into the egg-sugar mixture while whisking constantly. This gradual temperature increase allows the eggs to acclimate. Once combined, pour the egg mixture back into the saucepan with remaining cream, whisking continuously.
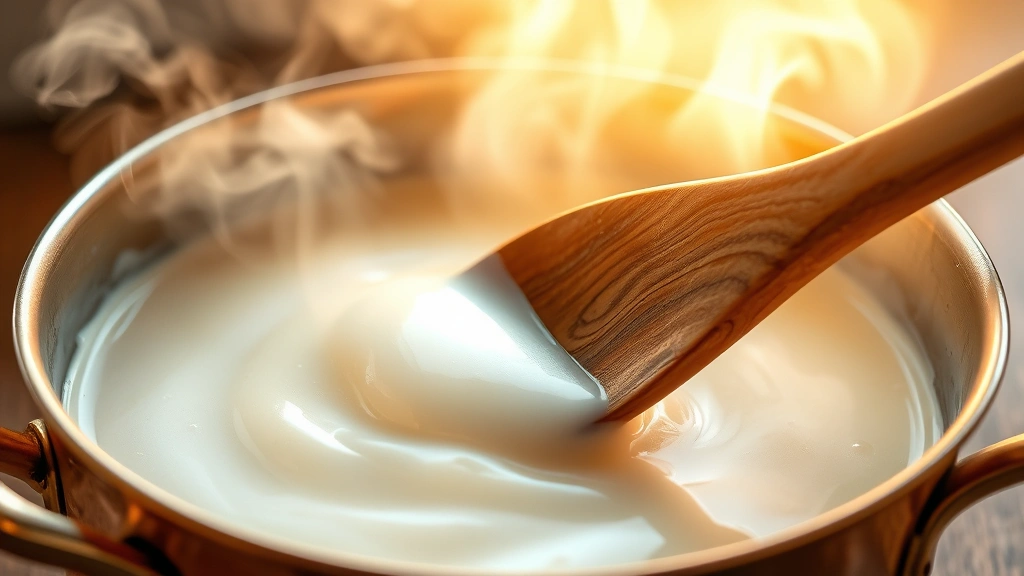
Step 4: Cook the Custard
Continue cooking over medium heat, stirring frequently with a wooden spoon, until the mixture reaches 160°F (71°C)—about five to eight minutes. The custard should coat the back of the spoon; when you run your finger across it, the line should hold. Avoid exceeding 170°F, which can cause graininess.
Step 5: Strain and Flavor
Pour the custard through a fine-mesh strainer into a clean bowl. This removes any accidentally cooked egg bits. Stir in one tablespoon vanilla extract and one-quarter teaspoon sea salt. The salt enhances vanilla flavor perception without making the ice cream taste salty.
Step 6: Chill Thoroughly
Place the bowl in an ice bath (a larger bowl filled with ice and water) for fifteen to twenty minutes, stirring occasionally. Alternatively, refrigerate for at least four hours, or overnight if convenient. The colder your base, the better your final ice cream texture. Aim for a temperature below 40°F (4°C) before churning.
Churning and Freezing Techniques
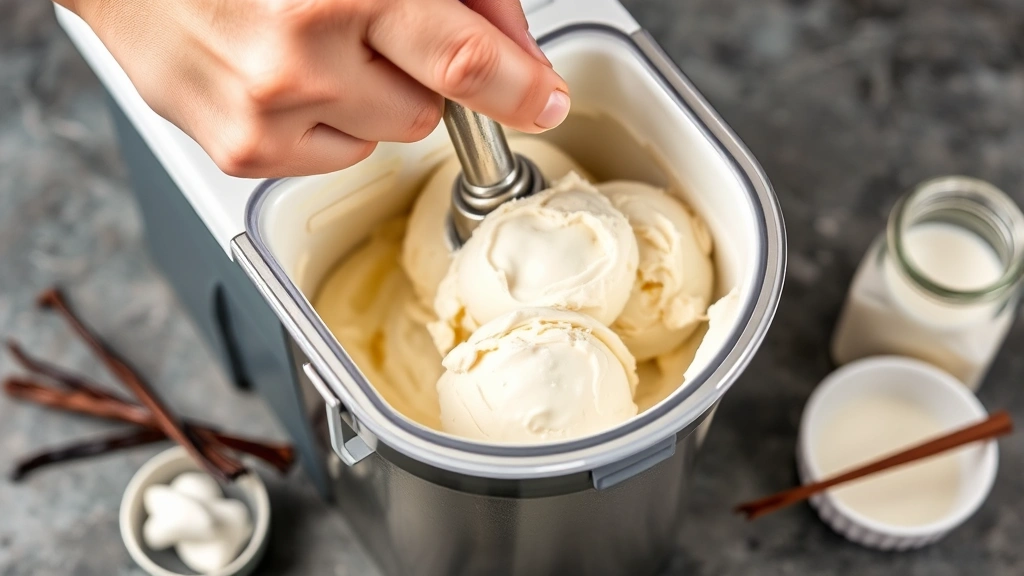
Churning transforms your chilled custard into creamy ice cream through simultaneous freezing and air incorporation. If you own an ice cream maker with a pre-frozen bowl, activate it according to manufacturer instructions—typically, you’ll run it for five to ten minutes before adding custard.
Pour your chilled custard into the churning chamber slowly. Most machines churn between twenty and thirty minutes. You’re watching for soft-serve consistency—the mixture should be thick, smooth, and still slightly soft. Churning beyond this point risks creating overly dense or grainy ice cream.
Transfer your soft ice cream to shallow freezer-safe containers immediately after churning. Press plastic wrap or parchment paper directly onto the surface to prevent ice crystals from forming. Freeze for at least four hours, preferably overnight, until completely firm. This hardening period allows flavors to meld and texture to set properly.
If you lack an ice cream maker, use the hand-stirring method. Pour your chilled custard into a shallow metal pan and place it in the freezer. Every thirty minutes, remove it and stir vigorously with a fork, breaking up ice crystals. Repeat this process for three to four hours until you achieve soft-serve consistency, then transfer to a container and freeze solid. This method requires more effort but produces acceptable results.
Storage matters significantly. Properly stored homemade ice cream keeps for two to three weeks in the freezer. Keep it in an airtight container, and avoid exposing it to temperature fluctuations, which cause large ice crystals to form. If your ice cream becomes rock-hard, remove it from the freezer fifteen minutes before serving to soften slightly.
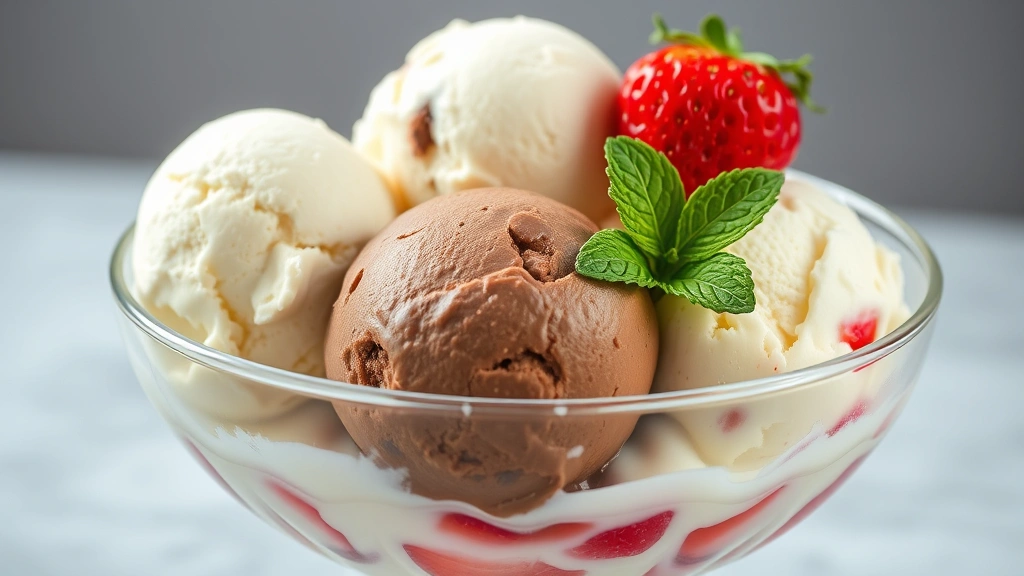
Flavor Variations and Mix-Ins
Once you master the basic ice cream recipe technique, endless variations await. The beauty of homemade ice cream lies in customization—you control sweetness, flavor intensity, and texture completely.
Fruit-Based Ice Creams
Strawberry, raspberry, and peach ice creams require slightly different approaches than vanilla. For fruit purees, use fresh or frozen fruit blended smooth. Strain the puree through a fine-mesh sieve to remove seeds, then fold into your chilled custard base just before churning. Use approximately one to one-and-a-half cups puree per quart of ice cream. Reduce the milk slightly to accommodate the additional liquid. Citrus zests (lemon, lime, orange) integrate beautifully into the base before churning—add one to two tablespoons of finely grated zest.
Chocolate Ice Cream
For rich chocolate ice cream, melt six to eight ounces of high-quality chocolate (70% cocoa or higher) in a bowl set over simmering water. Temper it by slowly whisking in one cup of your warm custard base until smooth. Add this mixture back to your remaining custard, whisking thoroughly to distribute evenly. Strain through a fine-mesh sieve before chilling to ensure silky texture. The dark chocolate flavor develops more fully after freezing, so don’t be concerned if it tastes slightly less chocolatey at the custard stage.
Coffee and Espresso Ice Cream
Brew strong espresso or use espresso powder dissolved in hot water. Add two to three tablespoons of espresso to your warm custard base, stirring thoroughly. Some recipes incorporate a touch of instant espresso powder—about one tablespoon—for intensified flavor. Chill and churn as usual. Coffee pairs beautifully with chocolate, so consider swirling in some chocolate sauce during the final minutes of churning.
Mix-Ins and Swirls
Add mix-ins during the final two minutes of churning when the ice cream reaches soft-serve consistency. This timing prevents them from being pulverized into tiny pieces. Excellent options include crushed cookies, toasted nuts, brownie chunks, candy pieces, and fresh fruit. For swirls, layer your soft ice cream with sauces (caramel, chocolate, fruit) in your storage container, using a knife to create marbling patterns.
Many home cooks find that creating homemade sauces to accompany ice cream elevates the experience further. A rich chocolate sauce, fresh fruit compote, or caramel drizzle transforms simple vanilla ice cream into a restaurant-quality dessert.
Troubleshooting Common Problems
Grainy or Icy Texture
This occurs when ice crystals grow too large, usually from inadequate churning, insufficient sugar, or freezer storage at fluctuating temperatures. Ensure your base is thoroughly chilled before churning, and avoid interrupting the churning process. If your mixture isn’t sweet enough, ice crystals form more easily. Add a tablespoon of corn syrup or glucose to your base—these sugars interfere with crystal formation.
Too Soft or Won’t Freeze Solid
If your ice cream remains soft after proper freezing time, your sugar content may be too high or your egg ratio too low. Each affects the freezing point. Conversely, if your ice cream becomes rock-hard and impossible to scoop, reduce sugar slightly in future batches. Storing at a slightly higher freezer temperature (around -5°F instead of -20°F) helps maintain scoop-ability.
Curdled or Separated Appearance
Overcooking the custard causes this issue. If your mixture exceeds 170°F, the eggs can scramble. Always use an instant-read thermometer and remove from heat immediately at 160°F. If separation occurs, strain the mixture through fine-mesh sieve and add a tablespoon of cornstarch mixed with cold milk to help re-emulsify.
Weak Flavor
Homemade ice cream sometimes tastes less flavorful than expected once frozen because cold suppresses taste perception. If your vanilla ice cream seems bland, increase vanilla extract by half a teaspoon, or use a vanilla bean instead of extract. For fruit flavors, use fully ripe fruit or frozen fruit for concentrated flavor. A pinch of salt enhances all flavors naturally.
Crystallized Surface During Storage
This occurs when air exposure causes sublimation. Always press plastic wrap directly onto the ice cream surface before covering the container. Store in the coldest part of your freezer, away from items that open frequently. Transfer ice cream to the refrigerator fifteen minutes before serving rather than leaving it on the counter to soften.
For those interested in expanding their culinary skills beyond ice cream, exploring how to make homemade salad dressings teaches similar emulsification principles. Additionally, mastering how to make homemade sauces creates perfect accompaniments for your ice cream creations.
Advanced Techniques and Professional Tips
Professional pastry chefs employ several advanced techniques that elevate homemade ice cream to extraordinary levels. One technique involves using a portion of the sugar as a dry ingredient in the egg yolk mixture and the remainder dissolved in the cream. This approach, called “split sugar,” improves texture by controlling ice crystal size more precisely.
Another professional secret involves adding a small amount of alcohol—typically one to two tablespoons of vodka or rum per quart—which lowers the freezing point further, creating exceptionally smooth, scoopable ice cream. The alcohol flavor is undetectable in properly proportioned recipes.
Some chefs incorporate a small amount of gelatin or cornstarch dissolved in cold milk before mixing with the custard. These stabilizers trap water molecules, preventing large ice crystal formation and extending shelf life. Typically, one-quarter teaspoon gelatin or one-half teaspoon cornstarch per quart suffices.
Aging your custard base overnight before churning allows flavors to develop more fully and improves overall texture. This resting period permits proteins to hydrate completely and helps stabilizers work more effectively. Plan ahead when possible to take advantage of this simple improvement.
For those pursuing culinary excellence, consulting resources like ChefSteps provides detailed scientific explanations of cooking techniques, while Cook’s Illustrated offers rigorously tested recipes and methods. The International Association of Culinary Professionals maintains resources for developing advanced cooking skills.
Seasonal and Creative Variations
Seasonal ingredients inspire creative ice cream variations. Spring brings fresh mint and strawberries; summer offers peaches, blueberries, and basil; fall introduces pumpkin, apple, and cinnamon; winter welcomes eggnog, peppermint, and gingerbread flavors.
Mint chocolate chip requires fresh mint steeped in warm cream. Combine two cups heavy cream with one cup whole milk and one-quarter cup fresh mint leaves. Heat gently without boiling, then remove from heat and let steep for thirty minutes. Strain out mint, then proceed with the standard custard-making process. Fold in chopped dark chocolate during the final minutes of churning.
Pumpkin ice cream incorporates one cup puree pumpkin (not pumpkin pie filling) into your base along with one-half teaspoon cinnamon, one-quarter teaspoon nutmeg, one-eighth teaspoon clove, and one-eighth teaspoon ginger. Reduce milk to half a cup to accommodate the additional liquid.
Salted caramel requires making caramel sauce separately. Melt three-quarters cup sugar over medium heat without stirring, just swirling the pan occasionally. Once amber-colored, remove from heat and add six tablespoons butter and one-third cup heavy cream (be careful, it will bubble). Stir in one teaspoon sea salt. Cool completely, then swirl into soft ice cream during the final churning minutes.
Making Homemade Mix-Ins and Toppings
Creating complementary mix-ins and toppings from scratch elevates your ice cream experience. Homemade brownie chunks, cookie crumbles, and fruit compotes taste superior to store-bought alternatives and contain no artificial ingredients.
For brownie chunks, prepare a simple brownie recipe, cool completely, then cut into quarter-inch pieces. Store in an airtight container until ready to use. Similarly, bake your favorite cookies, cool, then break into bite-sized pieces. Biscotti works particularly well because it’s already designed to be crispy and long-lasting.
Fruit compotes involve cooking fresh or frozen fruit with a small amount of sugar and lemon juice until jammy. Simmer berries for ten to fifteen minutes; stone fruits require slightly longer. Cool completely before swirling into soft ice cream. These compotes also serve as excellent accompaniments to plain vanilla ice cream, making them versatile additions to your culinary toolkit.
Toasted nuts add wonderful texture contrast. Toast raw nuts at 350°F for eight to twelve minutes, depending on variety and size, until fragrant. Cool completely before chopping and adding to soft ice cream. Pecans, walnuts, almonds, and hazelnuts all work beautifully.
For those exploring broader dessert-making skills, understanding how to make homemade pasta sauce teaches fundamental sauce-making principles applicable to dessert sauces and syrups.
Storage and Serving Guidance
Proper storage extends your homemade ice cream’s shelf life and maintains quality. Airtight containers prevent sublimation and flavor absorption from surrounding foods. Glass containers work better than plastic because they don’t absorb odors or flavors. Stainless steel containers are excellent for commercial-style storage.
Homemade ice cream keeps for two to three weeks in a properly maintained freezer at 0°F (-18°C). Avoid frequent temperature fluctuations, which cause large ice crystals to form and texture to degrade. Store ice cream in the coldest section of your freezer, away from the door where temperature varies most.
For serving, remove ice cream from the freezer five to fifteen minutes before scooping, depending on how soft you prefer it. Dip your scooper in warm water between scoops to create smooth, attractive scoops. Warm scoops glide through frozen ice cream more easily than cold ones.
Consider offering multiple complementary toppings and sauces when serving homemade ice cream. Fresh berries, toasted nuts, whipped cream, chocolate sauce, and caramel create a memorable dessert experience. For special occasions, serve ice cream in chilled bowls or glasses to slow melting.
Gift-giving homemade ice cream requires special consideration. Pack it in an insulated container with dry ice for transport, and deliver to recipients immediately. Include storage instructions so they understand your ice cream’s shelf life and optimal storage conditions.
FAQ
Can I make ice cream without eggs?
Yes, though texture differs slightly. Egg-free ice cream uses cornstarch or gelatin as stabilizers instead. Mix two tablespoons cornstarch with one-quarter cup cold milk, then heat with the cream and milk base, stirring until thickened. This method produces acceptable results but lacks the silky mouthfeel eggs provide. Pasteurized eggs are completely safe when heated to 160°F.
What’s the difference between ice cream and gelato?
Gelato contains less fat (typically 7-10% versus 14-25% for ice cream) and less air, creating denser texture. Gelato is served at slightly warmer temperatures, making it softer and more flavorful. The same basic custard technique works for both; gelato simply uses less cream and churns less, incorporating less air.
Why is my ice cream too hard to scoop?
Excessive sugar content or storage at too-cold temperatures causes this. Try reducing sugar slightly in future batches. Additionally, store ice cream at -5°F instead of -20°F if your freezer allows temperature adjustment. Dipping your scooper in warm water between scoops also helps.
Can I use a blender instead of an ice cream maker?
Not effectively. Blenders don’t freeze while blending, and the mixture will melt quickly. However, you can use the hand-stirring method described earlier, or freeze the custard in ice cube trays, then blend frozen cubes with a splash of milk or cream for a sorbet-like texture.
How far ahead can I prepare the custard base?
Prepare the custard base up to three days ahead. Store it in an airtight container in the refrigerator. Aging the base actually improves flavor and texture, so preparing it a day or two before churning is ideal. Stir before churning if a skin has formed on top.
What stabilizers work best for homemade ice cream?
Egg yolks are the most natural stabilizer and produce superior results. If avoiding eggs, gelatin (one-quarter teaspoon per quart), cornstarch (one-half teaspoon per quart), or guar gum (one-eighth teaspoon per quart) work well. Dissolve gelatin in cold water before mixing with warm custard; mix cornstarch with cold milk before heating.
Why does homemade ice cream sometimes taste less sweet than store-bought?
Cold suppresses taste perception, including sweetness. Homemade ice cream typically contains less sugar than commercial brands, which compensate for this effect. If your ice cream tastes insufficiently sweet, increase sugar by two tablespoons in future batches, but avoid exceeding one cup sugar per quart, which creates overly soft ice cream.
Can I freeze ice cream in a regular freezer without an ice cream maker?
Yes, using the hand-stirring method. Pour custard into a shallow metal pan and freeze, stirring vigorously every thirty minutes for three to four hours. This requires more effort but produces acceptable results. The key is breaking up ice crystals frequently to prevent large crystal formation.
What’s the best way to incorporate mix-ins?
Add mix-ins during the final two to three minutes of churning when the ice cream reaches soft-serve consistency. This timing prevents them from being pulverized. If using soft items like brownies or cookies, chop them into quarter-inch pieces or smaller to distribute evenly throughout the ice cream.
How do I prevent ice crystals from forming on the surface during storage?
Press plastic wrap or parchment paper directly onto the ice cream surface before covering the container. This eliminates air exposure, which causes sublimation. Additionally, maintain a consistent freezer temperature at 0°F or below, and minimize door opening to prevent temperature fluctuations.


