Ripe Banana Bread? Grandma’s Secret Recipe That’ll Change Everything
There’s something magical about the aroma of banana bread baking in the oven—that sweet, comforting smell that fills your entire home and brings back memories of simpler times. My grandmother has been making her legendary banana bread for over fifty years, and after countless requests from family and friends, she finally shared her closely guarded secrets with me. This isn’t just any banana bread recipe; it’s a masterpiece that balances moisture, flavor, and that perfect tender crumb that keeps people coming back for more.
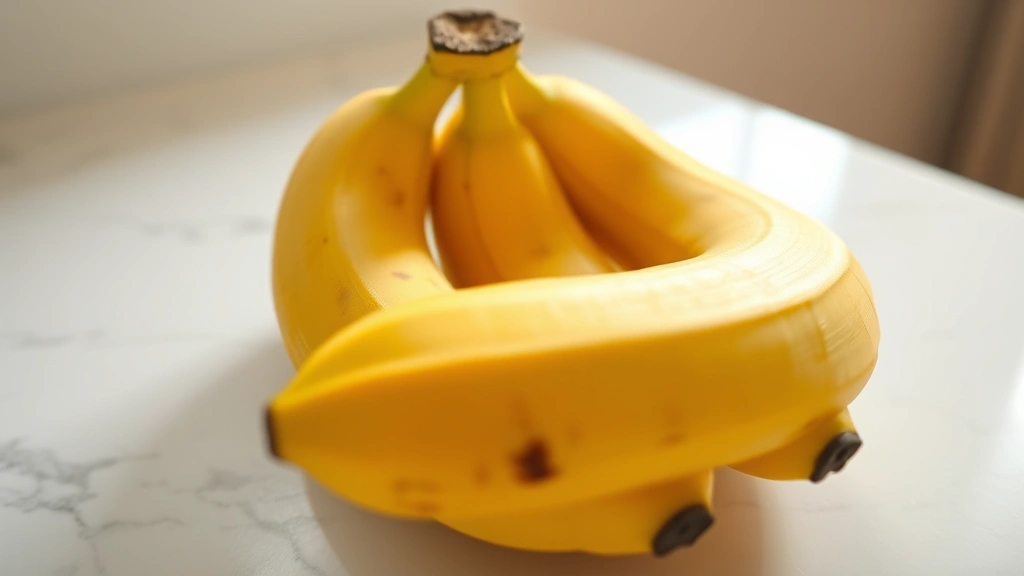
The key to extraordinary banana bread lies in understanding when your bananas are truly ready. Most home bakers don’t realize that the ripeness of your bananas makes all the difference between mediocre and magnificent. My grandmother taught me that you need bananas that are almost past their prime—those brown-spotted beauties that many people throw away. The natural sugars have concentrated, the starches have converted to simple sugars, and the flavor is incredibly intense. This is the foundation of her secret, and it’s why her banana bread tastes so phenomenal.
Why Ripe Bananas Matter for Perfect Banana Bread
Understanding banana ripeness is fundamental to creating exceptional banana bread. My grandmother always said, “A banana tells you when it’s ready to be bread,” and she was absolutely right. When you’re selecting bananas for bread-making, you want to look for those with deep yellow skin covered in brown freckles or patches. These spots indicate that the banana’s starches have fully converted to sugars, creating a naturally sweeter, more flavorful base for your bread.
The science behind this is fascinating. As bananas ripen, their cell walls break down, making them softer and easier to mash. The higher sugar content also means you can reduce the amount of added sugar in your recipe, creating a more naturally sweet bread. Additionally, ripe bananas contribute more moisture to your batter, which helps create that tender, almost moist crumb that makes banana bread so irresistible. My grandmother often uses bananas that are almost completely brown—some bakers might think they’re past their prime, but that’s when they’re absolutely perfect for bread.
If you find yourself with bananas that are ripening faster than you can use them, don’t panic. Simply peel them, wrap them tightly in plastic wrap, and freeze them. You can store frozen bananas for up to three months, and they work beautifully in banana bread. When you’re ready to bake, thaw them at room temperature and use them just as you would fresh bananas. The freezing process actually makes them even easier to mash.
Gathering Your Ingredients: Quality Makes the Difference
My grandmother’s banana bread recipe calls for simple, quality ingredients—nothing fancy or hard to find. The beauty of this recipe is that you probably have most of these items in your kitchen right now. However, the quality of each ingredient directly impacts your final result, so it’s worth being intentional about what you choose.
The Essential Ingredients:
- 3 to 4 very ripe bananas (about 1 to 1.5 cups mashed)
- 1/2 cup unsalted butter, softened to room temperature
- 3/4 cup granulated sugar
- 1/4 cup brown sugar (adds depth and moisture)
- 2 large eggs, room temperature
- 1 teaspoon pure vanilla extract
- 1 3/4 cups all-purpose flour
- 1 teaspoon baking soda
- 1/2 teaspoon salt
- 1/2 teaspoon ground cinnamon
- 1/4 teaspoon ground nutmeg
- 1/2 cup Greek yogurt or sour cream (my grandmother’s secret ingredient)
Let me highlight why my grandmother insists on each of these components. The combination of granulated and brown sugar creates complexity—the brown sugar adds moisture and a subtle molasses note that enhances the banana flavor. Using room-temperature eggs and butter ensures proper emulsification, which creates a finer crumb structure. The Greek yogurt is absolutely crucial; it adds tanginess that balances the sweetness and creates incredible moisture without making the bread dense.
My grandmother always uses real vanilla extract, never the imitation version. She says the difference is subtle but noticeable, and the real vanilla complements the banana flavor in ways that artificial vanilla simply cannot. The spices—cinnamon and nutmeg—should be fresh. If you’ve had the same container sitting in your spice rack for three years, it’s time to replace it. Stale spices contribute little flavor and can actually taste musty.
The Step-by-Step Baking Process
Now we arrive at the actual baking, where my grandmother’s techniques transform simple ingredients into extraordinary banana bread. This is where patience and attention to detail matter most.
Preparation and Setup:
Begin by preheating your oven to 350°F (175°C). Grease a standard 9×5-inch loaf pan thoroughly with butter or cooking spray, or line it with parchment paper for easy removal. My grandmother prefers parchment paper because it ensures even browning and makes cleanup effortless. Have all your ingredients measured and ready before you begin—this is called mise en place, and it’s a professional technique that ensures nothing gets forgotten.
Creating the Perfect Batter:
Start by peeling your ripe bananas and placing them in a large bowl. Using a fork, mash them until you reach your desired consistency. My grandmother likes hers with just a few small lumps remaining—not completely smooth, as those tiny pieces add texture to the finished bread. You should have approximately 1 to 1.5 cups of mashed banana.
In a separate medium bowl, whisk together your flour, baking soda, salt, cinnamon, and nutmeg. Set this dry mixture aside. In a large mixing bowl, cream together your softened butter and both sugars. Use an electric mixer on medium speed for about 2-3 minutes until the mixture is light, fluffy, and pale. This creaming process incorporates air into the batter, which helps create a lighter crumb structure.
Add your room-temperature eggs one at a time to the butter mixture, beating well after each addition. Pour in your vanilla extract and mix until combined. Now add your mashed bananas and mix on low speed until just incorporated. The batter should look slightly lumpy at this point—don’t overmix.
Gently fold in your Greek yogurt using a spatula or wooden spoon, stirring until just combined. Finally, add your dry ingredients to the wet mixture, folding gently with a spatula until you see no streaks of flour. This is crucial: overmixing at this stage develops gluten, which can result in a tough, dense loaf. You want your batter to be just combined, with perhaps a few flour streaks remaining.
Pour your batter into your prepared loaf pan, smoothing the top with a spatula. My grandmother has a trick here—she creates a slight depression down the center of the loaf, which helps it bake more evenly and prevents the top from cracking excessively.
The Baking Process:
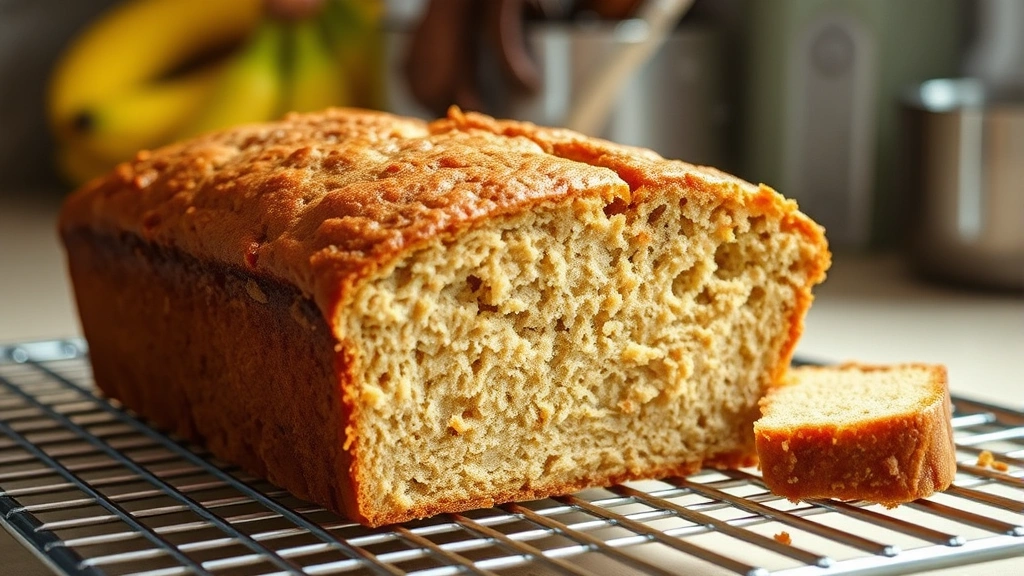
Place your loaf pan in the preheated oven and bake for 55-65 minutes. Every oven is different, so start checking at 55 minutes. The bread is done when a toothpick inserted into the center comes out with just a few moist crumbs clinging to it—not completely clean, but not wet either. The top should be golden brown, and the bread should feel springy when gently pressed.
Remove the banana bread from the oven and let it cool in the pan for 10 minutes. This resting period allows the structure to set slightly, making it easier to turn out. After 10 minutes, turn the loaf out onto a wire cooling rack. Let it cool completely before slicing—I know it’s tempting to cut into it while it’s still warm, but waiting ensures clean slices and proper texture development.
Troubleshooting Common Banana Bread Problems
Even experienced bakers encounter occasional issues with banana bread. My grandmother has encountered every possible problem over her fifty years of baking, and she’s developed solutions for each one.
Dense, Heavy Loaf: This usually indicates overmixing or not enough leavening. Make sure you’re folding gently when adding dry ingredients, and verify that your baking soda is fresh. Baking soda loses potency over time, so replace it annually if you bake frequently.
Dry Banana Bread: Paradoxically, this often comes from using insufficiently ripe bananas or overbaking. Ensure your bananas are truly ripe with brown spots, and use a toothpick to test for doneness rather than baking for the full time if your oven runs hot. The Greek yogurt addition should provide plenty of moisture.
Raw Center: If your bread is raw in the middle but the top is browning too quickly, tent the top with aluminum foil and continue baking. This prevents the exterior from burning while the interior finishes cooking.
Cracked Top: This is actually normal and happens because the batter rises quickly and splits the top. My grandmother creates that center depression specifically to direct this cracking. If you want a smoother top, you can cover the pan with foil for the first 25 minutes of baking, then remove it to allow browning.
Sunken Center: This indicates too much baking soda or not enough flour. Double-check your measurements using the spoon-and-level method rather than scooping directly from the bag.
Storage and Serving Suggestions
One of the best things about banana bread is that it stores beautifully, making it perfect for meal prep or gift-giving. My grandmother always makes several loaves at once because they keep so well.
Room Temperature Storage: Wrap your completely cooled banana bread tightly in plastic wrap or place it in an airtight container. It will keep at room temperature for 2-3 days. The bread actually tastes better on day two, as the flavors have time to meld and the texture becomes more uniform.
Refrigerator Storage: For longer storage, wrap your banana bread in plastic wrap and then place it in a freezer bag. It will keep in the refrigerator for up to one week. When ready to eat, simply slice and enjoy at room temperature or warm briefly in the microwave.
Freezer Storage: This is my grandmother’s preferred method for long-term storage. Slice your cooled banana bread and layer the slices between parchment paper in a freezer-safe container. It will keep frozen for up to three months. You can thaw individual slices as needed, or thaw the entire loaf overnight in the refrigerator.
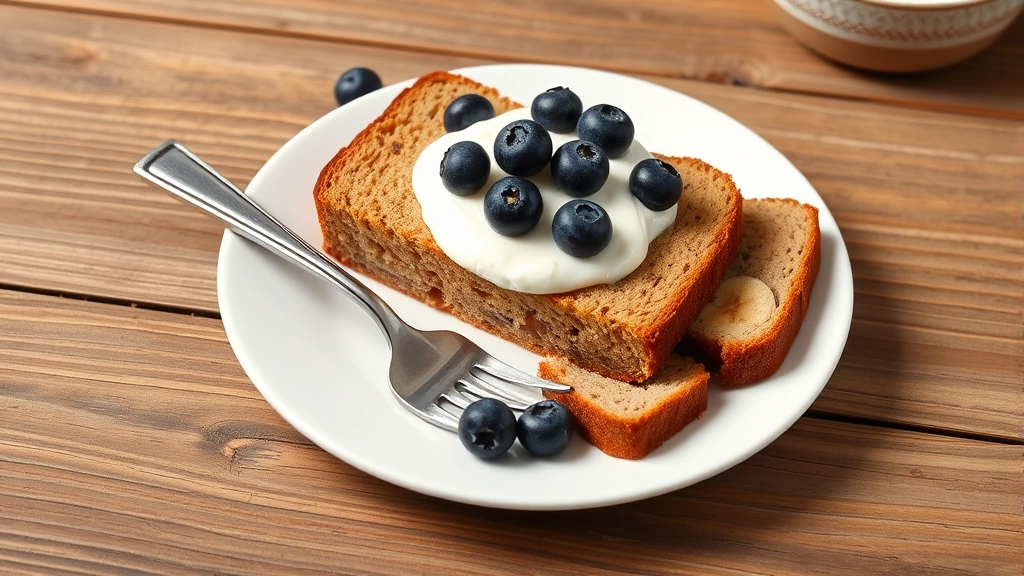
My grandmother loves serving her banana bread in several ways. Warm slices are delicious on their own, but they’re also wonderful with a spread of creme fraiche or Greek yogurt topped with fresh berries. For a more indulgent treat, try spreading warm banana bread with almond butter and a drizzle of honey. Some family members love toasting day-old slices and serving them with butter and jam for breakfast.
You can also crumble banana bread and use it as a base for a parfait with yogurt and granola, or incorporate it into a trifle with whipped cream and fruit. The possibilities are endless, and that’s part of why this recipe has remained a family favorite for generations.
FAQ
Can I use frozen bananas for banana bread?
Absolutely! Frozen bananas work wonderfully in banana bread. In fact, they’re often easier to mash because freezing breaks down the cell structure. Simply thaw them at room temperature, and they’ll be perfect for your recipe.
Can I add nuts or chocolate chips to this recipe?
Yes, though my grandmother prefers the bread without additions to showcase the banana flavor. If you’d like to add them, fold in 1/2 to 1 cup of chopped walnuts, pecans, or chocolate chips just before pouring the batter into the pan.
What if I don’t have Greek yogurt?
You can substitute regular sour cream, plain yogurt, or even buttermilk in equal amounts. Each will provide similar moisture and tanginess, though the flavor profile will be slightly different.
Why did my banana bread sink in the middle?
This usually indicates too much baking soda or leavening. Use the spoon-and-level method to measure your baking soda, or consider using a kitchen scale for precision.
Can I make this recipe in muffin tins instead?
Yes! This batter works perfectly for muffins. Fill muffin cups about two-thirds full and bake at 350°F for 18-22 minutes until a toothpick comes out with just a few moist crumbs.
Is this recipe suitable for a gluten-free diet?
You can substitute all-purpose flour with a gluten-free blend, though the texture may be slightly different. Use a 1:1 gluten-free flour blend and ensure your baking soda is gluten-free certified.


