Fluffy Sourdough Focaccia: Proven Method for Bakery-Quality Results
Sourdough focaccia represents the perfect intersection of artisan breadmaking and everyday baking. Unlike traditional focaccia that relies on commercial yeast, this sourdough version develops complex flavor through natural fermentation while achieving that signature airy, dimpled crumb that makes focaccia so irresistible. The beauty of this method lies in its flexibility—whether you’re an experienced baker or picking up sourdough for the first time, this proven technique delivers consistently fluffy results.
The key to mastering sourdough focaccia isn’t complicated chemistry or expensive equipment. It’s understanding how time, temperature, and technique work together to create an open crumb structure with tender edges and a crispy, olive oil-kissed exterior. This guide walks you through every stage, from preparing your starter to achieving those perfect dimples that trap pools of seasoned olive oil.

Understanding Sourdough Focaccia Basics
Sourdough focaccia differs from conventional focaccia in several important ways. Traditional focaccia uses commercial yeast (usually instant or active dry) and completes fermentation in 4-6 hours. Sourdough focaccia, by contrast, relies on wild yeast and bacteria cultivated in a sourdough starter, requiring 12-48 hours depending on temperature and strength of your culture.
This extended fermentation period creates several advantages. The wild yeast ferments more slowly, allowing enzymes to break down gluten and improve digestibility. Bacteria produce lactic and acetic acids that develop deeper, more complex flavors—you’ll notice subtle tangy notes that commercial yeast simply cannot replicate. The slow rise also allows better dough structure development, resulting in those gorgeous open crumbs and superior fluffiness.
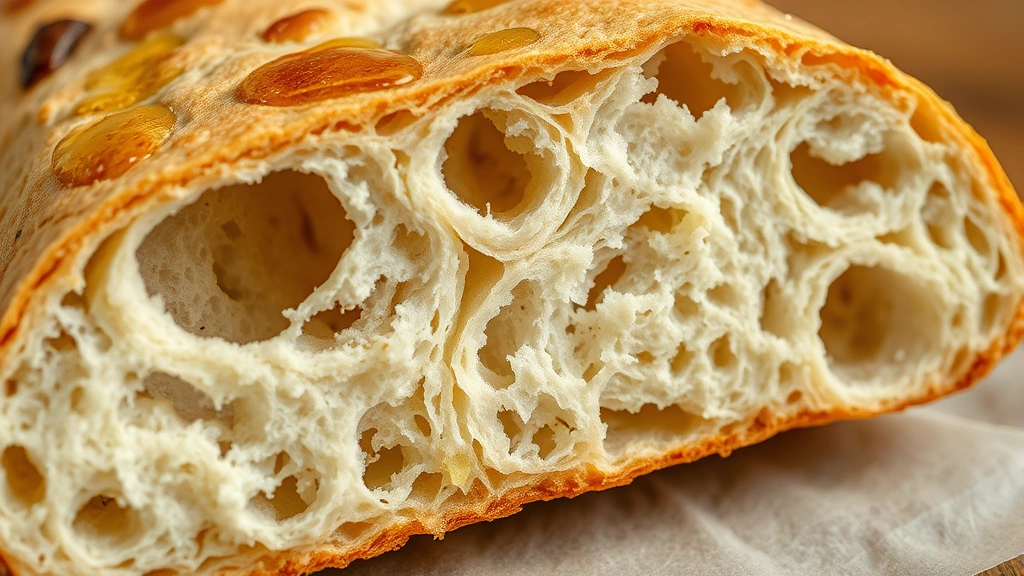
The crumb structure of sourdough focaccia is noticeably different from yeasted versions. You’ll achieve larger, more irregular holes distributed throughout the dough, creating a lighter texture that still maintains structural integrity. This happens because the wild yeast produces different fermentation byproducts and the extended timeline allows for better gluten development through autolyse and stretch-and-fold techniques.
Essential Ingredients and Equipment
Ingredients for one large focaccia (approximately 14×10 inches):
- 500g bread flour (or all-purpose flour)
- 350ml water (70% hydration)
- 100g active sourdough starter (fed 4-8 hours prior)
- 10g sea salt
- 7g instant yeast (optional, for reliability)
- 60ml extra virgin olive oil (divided)
- Coarse sea salt for topping
- Fresh rosemary sprigs
- Fleur de sel or finishing salt
Essential equipment:
- Digital scale (non-negotiable for consistent results)
- Large mixing bowl
- Rectangular baking pan (9×13 inches minimum)
- Dutch oven or covered baking vessel (optional but recommended)
- Bench scraper or dough card
- Spray bottle for misting
- Instant-read thermometer
- Stand mixer with dough hook (optional but helpful)
A digital scale transforms your baking consistency. By weight rather than volume, you eliminate variables that cause inconsistent results. This is especially important with sourdough, where hydration levels directly impact crumb structure and fluffiness.
Preparing Your Sourdough Starter
Your sourdough starter is the foundation of this entire process. A strong, active starter produces better fermentation, better flavor, and better rise. If you’re new to sourdough, you’ll need to create a starter first—this takes about 5-7 days of daily feeding with equal parts flour and water.
Feeding schedule before baking:
For best results, feed your starter 4-8 hours before mixing dough. The ideal time to use it is when it’s at peak activity—when it has risen significantly and shows visible bubbles throughout, but before it begins to collapse. Peak readiness typically occurs 4-6 hours after feeding, depending on room temperature.
If your kitchen is cool (below 68°F), your starter needs longer between feedings. In warmer environments (75-78°F), peak activity arrives faster. Use the float test: drop a small spoonful of starter into water. If it floats, it’s ready. If it sinks, wait longer.
For this recipe, you need approximately 100g of active starter. If your starter is particularly vigorous, you might use slightly less (80-90g). A sluggish starter might benefit from 110-120g. The stronger your starter, the less you need, but the more you use, the faster fermentation occurs—something to account for during bulk fermentation.
Making the Dough
Step 1: Autolyse (Optional but Recommended)
Mix 500g flour with 350ml water, stirring until no dry flour remains. Let this mixture rest 30 minutes to 2 hours. This hydration period allows flour to fully absorb water and gluten to develop naturally without kneading. Autolyse produces noticeably better texture and requires less mixing effort later.
Step 2: Mixing
After autolyse, add your 100g active sourdough starter and 10g sea salt to the flour-water mixture. If using a stand mixer, mix on low speed for 3-4 minutes until everything is incorporated. By hand, use a wet hand to pinch and fold the dough for 2-3 minutes until homogeneous.
The dough will feel shaggy and slightly sticky at this stage—this is correct. Sourdough focaccia requires higher hydration (70%) than many breads, creating that open, airy crumb structure. If you’ve never worked with high-hydration dough, it feels counterintuitive, but resist adding flour.
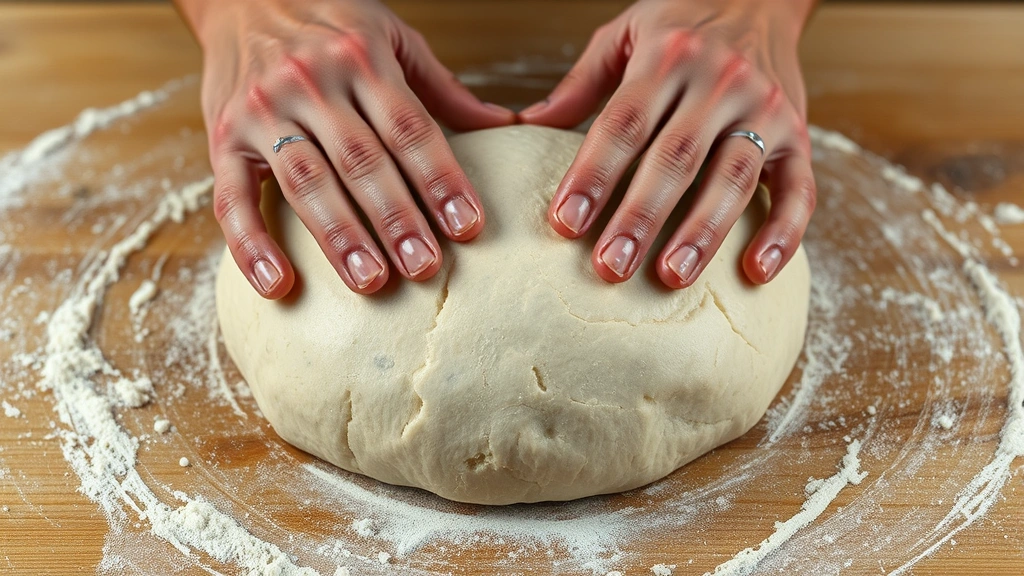
Step 3: Stretch and Fold Development
Rather than traditional kneading, use stretch-and-fold technique during the first 2 hours of bulk fermentation. Every 30 minutes, perform 4-6 stretch-and-fold motions: wet your hand, grab one side of the dough, stretch it up and fold it over the center. Rotate the bowl and repeat from all four sides. This technique develops gluten without aggressive mixing and is particularly effective for high-hydration doughs.
Perform stretch-and-fold sessions at 30-minute intervals for the first 2 hours. After that, the dough enters the final bulk fermentation phase where it rests undisturbed.
Bulk Fermentation Process
Bulk fermentation is where sourdough magic happens. This is the period when wild yeast and bacteria actively ferment the dough, developing flavor and gas structure that creates fluffiness.
Temperature and Timeline:
At 75-78°F, bulk fermentation takes 4-5 hours. At 70-72°F, expect 6-8 hours. At cooler temperatures (65-68°F), plan for 8-12 hours or even overnight fermentation. The goal is not a specific time but rather a specific dough state: the dough should increase in volume by 50-75%, show visible bubbles on the surface, and jiggle slightly when the bowl is shaken.
Visual cues matter more than timers. Check your dough every 2 hours after the first 2 hours of stretch-and-fold. You’re looking for increased volume, surface bubbles, and a slightly domed top. The dough shouldn’t double completely—that’s overfermentation and leads to weak gluten that produces dense, gummy focaccia instead of fluffy crumb.
Cold Fermentation Option:
Many bakers prefer extended cold fermentation (overnight in the refrigerator at 38-40°F). This slows fermentation dramatically, allowing complex flavors to develop while making the dough easier to handle. If using cold fermentation, perform your stretch-and-fold at room temperature for 2 hours, then refrigerate for 8-16 hours. Remove from refrigeration 1-2 hours before shaping to allow the dough to warm slightly.
Shaping and Final Rise
Preparing Your Pan:
Generously oil your rectangular baking pan with olive oil—at least 3 tablespoons. This oil serves multiple purposes: it prevents sticking, it creates the characteristic crispy, oiled bottom crust, and it provides flavor. Don’t skimp on this step.
Shaping Technique:
Gently turn your bulk-fermented dough onto the oiled pan. Using wet hands and a bench scraper, stretch the dough to fill the pan. Work gently—aggressive stretching deflates gas and reduces fluffiness. If the dough resists, let it rest 5 minutes and stretch again. The dough should be relatively thin, about ½ to ¾ inch thick.
Once the dough fills the pan, drizzle with additional olive oil (about 2 tablespoons) and let it rest 15 minutes before dimpling. This brief rest allows the dough to relax after stretching.
Creating Signature Dimples:
Wet your fingertips with water or oil to prevent sticking. Using your fingertips or thumbs, press firmly into the dough at regular intervals, creating deep dimples. Space dimples about 1.5-2 inches apart across the entire surface. These dimples serve aesthetic and functional purposes: they trap olive oil and toppings while breaking up the surface tension, allowing better oven spring.
Final Fermentation:
Cover the pan with plastic wrap or a damp kitchen towel. At room temperature (72-75°F), the final rise takes 1-2 hours. You’re looking for the dough to increase in height and become puffy but not completely doubled. The dough should feel airy when gently poked, with a slight resistance.
Alternatively, perform final fermentation in the refrigerator for 8-16 hours. Cold fermentation is forgiving and actually improves flavor development. Simply dimple the dough, cover, refrigerate, then bake directly from cold (add 5-10 minutes to baking time).
Baking to Golden Perfection
Oven Preparation:
Preheat your oven to 450°F for at least 30 minutes. A fully preheated oven is crucial for focaccia—it ensures immediate oven spring, creating those open, fluffy crumbs. If using a Dutch oven, preheat it as well (though it’s optional for focaccia).
Final Topping:
Just before baking, drizzle the focaccia generously with olive oil (about 2-3 tablespoons more). Sprinkle with coarse sea salt and fresh rosemary. The oil and salt are essential—they create the characteristic crispy, flavorful crust that defines great focaccia.
Baking Process:
Place the pan in your preheated oven. Bake for 20-25 minutes until the top is golden brown and the internal temperature reaches 205-210°F. The focaccia should sound hollow when tapped on the bottom.
If the top browns too quickly but the interior isn’t done, reduce oven temperature to 400°F and continue baking. Every oven behaves differently, so watch carefully during the last 5 minutes.
Cooling:
Remove from the oven and let cool in the pan for 5 minutes, then transfer to a wire rack. Resist the urge to slice immediately—the crumb continues to set as it cools. Wait at least 15 minutes before slicing, though 30 minutes is ideal.
Toppings and Flavor Variations
Classic rosemary and sea salt focaccia is perfection, but sourdough focaccia accepts numerous toppings beautifully. Your homemade salad dressing flavors can inspire focaccia variations.
Traditional Toppings:
- Fresh rosemary sprigs and fleur de sel
- Kalamata olives and dried oregano
- Caramelized onions and thyme
- Sliced tomatoes, garlic, and basil
- Roasted red peppers and black olives
Flavor Variations:
Create homemade sauces to brush onto focaccia before final fermentation. A garlic-infused olive oil mixed with dried herbs creates incredible depth. For Mediterranean variations, incorporate sun-dried tomatoes, fresh basil, or pesto into the dough itself.
You can also top focaccia after baking—brush with garlic oil, add fresh arugula, shaved parmesan, or drizzle with homemade pasta sauce for focaccia pizza. The possibilities are endless.
Adding Ingredients to Dough:
If incorporating olives, sun-dried tomatoes, or cheese into the dough itself, add them after bulk fermentation begins (around the 2-hour mark). This prevents them from interfering with gluten development during the initial phases. Distribute additions evenly during a stretch-and-fold session.
Storage and Serving Tips
Room Temperature Storage:
Freshly baked focaccia keeps well at room temperature for 2-3 days wrapped in paper or cloth (not plastic, which traps moisture and creates sogginess). Slice and serve with olive oil for dipping or use for quick breakfast recipes the next morning.
Freezing:
Focaccia freezes excellently for up to 3 months. Cool completely, wrap tightly in plastic wrap and aluminum foil, then freeze. Thaw at room temperature for 2-3 hours or refresh in a 350°F oven for 10 minutes to restore crispness.
Reviving Day-Old Focaccia:
Slice day-old focaccia and toast lightly in a 375°F oven for 5-8 minutes. This restores crispness to the exterior while keeping the interior tender. You can also wrap it in damp paper towels and microwave for 20-30 seconds, though oven method produces better texture.
Serving Suggestions:
Serve focaccia warm or at room temperature with olive oil for dipping. It’s perfect alongside soups, salads, or best healthy food recipes featuring fresh vegetables. Use it as a base for sandwiches or tear pieces for entertaining.
FAQ
Why is my focaccia dense instead of fluffy?
Dense focaccia usually results from overfermentation (dough fermented past peak activity), insufficient gluten development, or inadequate final rise. Ensure your bulk fermentation increases dough volume by only 50-75%, not doubled. Perform stretch-and-fold sessions consistently. Verify your sourdough starter is truly active at peak before mixing dough.
Can I use instant yeast instead of sourdough starter?
Yes, though you’ll sacrifice sourdough flavor complexity. Replace the 100g active starter with 7g instant yeast. Reduce bulk fermentation to 2-3 hours at room temperature. The resulting focaccia will be good but lacks the subtle tanginess and superior digestibility of true sourdough.
How do I know when bulk fermentation is complete?
Look for 50-75% volume increase, visible bubbles throughout the dough, and a slight jiggle when the bowl is shaken. Poke the dough gently—it should spring back slowly but not completely. If it springs back immediately, fermentation isn’t complete. If it doesn’t spring back at all, you’ve overfermented.
What if my kitchen is cold?
Cold kitchens slow fermentation. Use extended bulk fermentation (8-12 hours) or overnight cold fermentation in the refrigerator. Some bakers create a proofing box by placing the dough in a turned-off oven with the light on, which maintains warmer temperatures. You can also ferment in a cooler near a heating vent.
Can I make focaccia without a stand mixer?
Absolutely. Mix the dough by hand for 2-3 minutes until incorporated, then use stretch-and-fold technique during bulk fermentation instead of machine mixing. Stretch-and-fold actually develops better texture than machine mixing for this application, so hand-mixed focaccia is often superior.
Why is the bottom of my focaccia soggy?
Insufficient oil in the pan or underbaking causes soggy bottoms. Use at least 3-4 tablespoons of olive oil in the pan before shaping. Ensure your oven is fully preheated. Bake until the internal temperature reaches 205-210°F and the bottom is golden. If using a Dutch oven, remove it for the last 5 minutes to allow the bottom to crisp.


