
Venison Chili Recipe: Flavor-Packed Method
Venison chili stands as one of the most rewarding dishes for hunters and adventurous home cooks alike. Unlike beef chili, venison brings a deeper, earthier complexity that transforms this classic comfort food into something truly special. The lean meat requires thoughtful preparation and cooking techniques to achieve that perfect balance of tenderness and rich flavor that makes this dish absolutely unforgettable.
This comprehensive guide walks you through creating an authentic venison chili that captures the essence of wild game cooking. Whether you’re working with freshly harvested venison or premium cuts from your local butcher, these methods ensure restaurant-quality results every single time. The secret lies in understanding venison’s unique characteristics and adjusting traditional chili-making techniques accordingly.
Understanding Venison for Chili
Venison differs significantly from beef in composition, fat content, and flavor profile. This wild game meat contains considerably less marbling than beef, meaning it has fewer intramuscular fat deposits. While this makes venison an exceptionally lean and healthy protein choice, it also demands specific cooking approaches to prevent dryness. The meat’s flavor carries natural gamey notes that either become beautifully pronounced or overwhelmingly strong depending on your cooking method.
The best cuts for venison chili come from the shoulder, chuck, or neck areas. These tougher cuts contain abundant connective tissue that breaks down during long, slow cooking, creating incredibly tender meat. Ground venison works wonderfully too, though it requires careful browning to avoid compacting the meat. Always source your venison from reputable hunters or specialty butchers who properly age and process the meat. Proper aging—typically 7 to 14 days in controlled conditions—significantly reduces the gamey flavor while tenderizing the meat.
Understanding venison’s lean nature means incorporating fat strategically throughout your cooking process. Many experienced venison cooks add pork fat, bacon, or beef fat to balance the meat’s leanness. This isn’t cheating; it’s respecting the ingredient and ensuring the final dish achieves proper texture and mouthfeel. The fat also carries flavors that complement venison’s natural earthiness beautifully.
Essential Ingredients and Preparation
Creating exceptional venison chili begins with quality ingredients and proper prep work. Here’s what you’ll need for a large batch serving 8-10 people:
- 3 pounds venison chuck, cut into half-inch cubes (or ground venison)
- 6 ounces bacon or pancetta, diced
- 2 large yellow onions, diced
- 6 cloves garlic, minced
- 4 tablespoons tomato paste
- 2 cans (28 ounces each) crushed San Marzano tomatoes
- 3 tablespoons chili powder (preferably Ancho or a blend)
- 2 tablespoons ground cumin
- 1 tablespoon smoked paprika
- 1 teaspoon cayenne pepper (adjust to taste)
- 2 tablespoons brown sugar
- 2 cups beef or venison stock
- 2 cans (15 ounces each) kidney beans, drained and rinsed
- Salt and black pepper to taste
- 2 tablespoons olive oil
- 1 tablespoon balsamic vinegar
- Fresh cilantro for garnish
Begin preparation by patting your venison dry with paper towels. Moisture on the meat’s surface prevents proper browning and creates steam instead of the desirable golden crust. If using cubed venison, cut pieces uniformly to ensure even cooking throughout the pot. Season the meat generously with salt and pepper at least 30 minutes before cooking—this allows seasoning to penetrate the meat rather than sitting on the surface.
Dice your bacon into quarter-inch pieces and prep all aromatics before you begin cooking. Having everything ready—a technique chefs call mise en place—ensures smooth cooking progression and prevents overcooking any component while you’re prepping others. Mince your garlic fresh rather than using jarred; fresh garlic develops deeper flavors during the long cooking process.
[IMAGE_1]
Step-by-Step Cooking Method
Step One: Render the Bacon and Brown the Meat
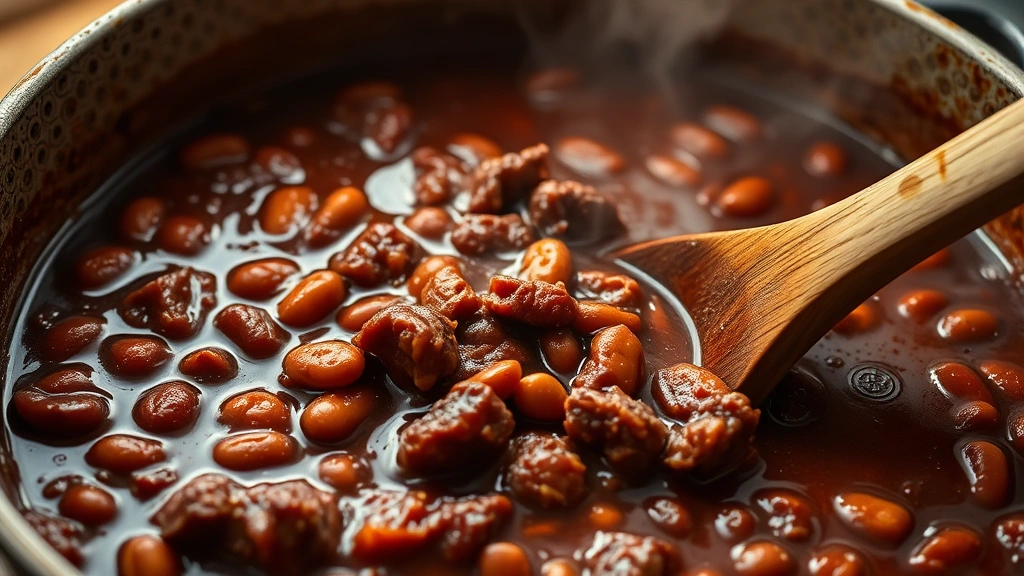
Heat a large Dutch oven or heavy-bottomed pot over medium-high heat. Add diced bacon and cook until fat renders and bacon achieves crispness, about 6-8 minutes. Remove bacon with a slotted spoon, leaving rendered fat in the pot. This bacon fat becomes your cooking medium for the venison, adding richness and preventing sticking.
Working in batches to avoid crowding the pot (which creates steam rather than browning), add venison pieces to the hot fat. Resist the urge to stir constantly; let each piece sit for 2-3 minutes to develop a proper brown crust. This Maillard reaction—the chemical process creating brown color and complex flavors—is crucial for developing the chili’s depth. Brown all venison thoroughly, about 15-20 minutes total, then transfer to a clean plate.
Step Two: Build the Aromatic Base
Reduce heat to medium and add diced onions to the pot. Scrape up any browned bits stuck to the bottom (called fond) using a wooden spoon; these concentrated flavors form your chili’s foundation. Cook onions until softened and beginning to caramelize, approximately 8-10 minutes. Add minced garlic and cook an additional minute until fragrant. Be careful not to burn garlic, which becomes bitter and unpleasant.
Step Three: Develop Spice Layers
Add tomato paste and stir constantly for 2-3 minutes. This step, called “blooming,” allows the tomato paste to caramelize slightly and release concentrated flavors. Next, add all dried spices: chili powder, cumin, smoked paprika, and cayenne. Stir constantly for another minute, coating all ingredients evenly. This brief cooking period activates spice essential oils, intensifying their flavors considerably.
Step Four: Deglaze and Build Liquid Base
Pour in beef or venison stock, scraping the pot’s bottom to dissolve any stuck bits. Add crushed tomatoes, brown sugar, and the reserved bacon. The brown sugar balances the chili’s acidity while adding subtle sweetness that rounds the flavor profile. Stir thoroughly to combine all elements.
Step Five: Long, Slow Simmer
Return the venison to the pot, stirring to distribute evenly throughout the liquid. Bring to a gentle simmer, then reduce heat to low. Cover partially with the lid (leaving it slightly ajar allows steam to escape while retaining moisture) and cook for 2.5 to 3 hours. The venison should become fork-tender; if it remains chewy after 2.5 hours, continue cooking an additional 30 minutes.
Stir occasionally—every 30-45 minutes—to ensure even cooking and prevent sticking on the bottom. Taste and adjust seasoning as you go; salt becomes more pronounced as liquid reduces, so add gradually.
Step Six: Add Beans and Final Seasoning
During the final 30 minutes of cooking, add drained kidney beans. This timing prevents mushy beans while allowing them to absorb surrounding flavors. Stir in balsamic vinegar, which adds complexity and depth without tasting vinegary. Taste again and adjust salt, pepper, and spices as needed. Some cooks add a pinch of cinnamon or chocolate here—just a quarter teaspoon creates subtle warmth without tasting sweet.
Flavor Development Techniques
Creating truly exceptional venison chili extends beyond following steps mechanically. Understanding flavor development principles elevates your dish from good to extraordinary. Venison’s natural earthiness pairs beautifully with warm spices like cumin and cinnamon, smoky notes from paprika, and the brightness of fresh cilantro.
One advanced technique involves toasting your dried spices before adding them to the pot. Place chili powder, cumin, and paprika in a dry skillet over medium heat for 1-2 minutes, shaking frequently. This gentle heat releases essential oils and deepens flavor intensity. Toast just until fragrant; overcooking creates bitter, unpleasant notes.
Layering flavors throughout cooking creates complexity that single-stage seasoning cannot achieve. Add some spices early during the browning phase, some with tomato paste, and reserve a small amount for finishing. This technique, called “seasoning in layers,” develops a more nuanced, sophisticated flavor profile.
Consider making a compound sauce to complement your chili’s richness. A simple sour cream mixed with fresh cilantro and lime juice provides cooling contrast and brightness. Alternatively, prepare homemade accompaniments like pickled onions or jalapeño relish to add acidic brightness.
Temperature control throughout cooking affects flavor development significantly. Maintaining a gentle simmer—not a rolling boil—allows flavors to meld gradually while preventing harsh, boiled tastes. If your chili boils vigorously, reduce heat further. Patience rewards you with silky, integrated flavors.
The overnight rest technique dramatically improves venison chili. Make your chili a full day ahead, refrigerate it, then reheat gently before serving. Flavors continue developing as ingredients sit together, and the chili tastes noticeably richer and more refined. This also makes entertaining easier since major work happens in advance.
Serving and Pairing Suggestions
Venison chili deserves thoughtful presentation and complementary accompaniments. Serve in warmed bowls rather than cold ones; temperature affects flavor perception, and warm bowls keep the chili at optimal serving temperature longer.
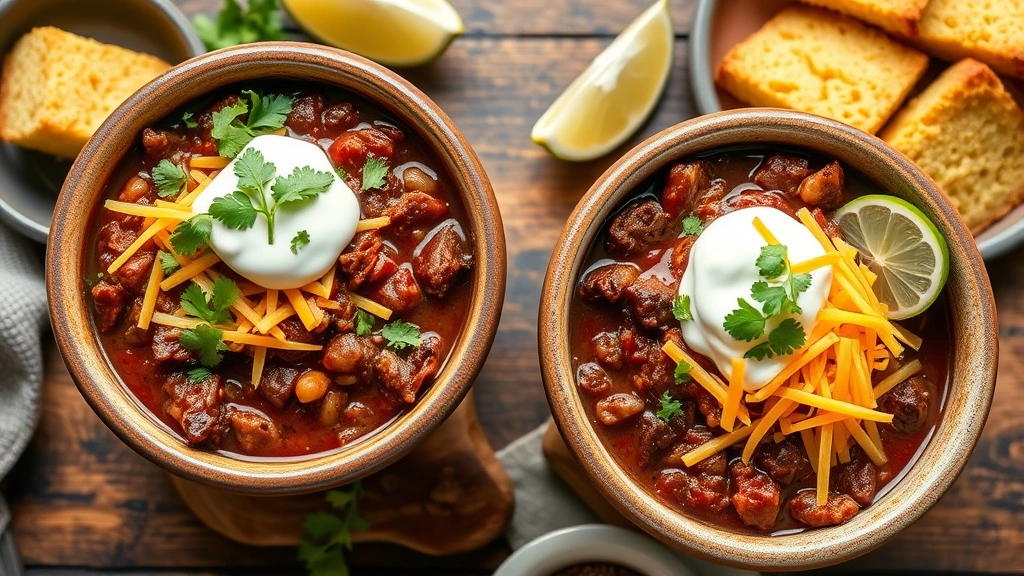
Classic toppings enhance the experience: shredded sharp cheddar cheese, sour cream, fresh cilantro, diced jalapeños, and sliced green onions. Consider offering lime wedges for squeezing—the acidity brightens venison’s richness beautifully. Cornbread or jalapeño cornbread provides perfect textural contrast to the chili’s hearty nature.
For wine pairing, choose medium-bodied reds with good acidity. Zinfandels, Côtes du Rhône, or Spanish Tempranillos complement venison chili’s spiced earthiness without overpowering it. Avoid heavy, oaky wines that compete with the dish’s complex flavors.
Venison chili works wonderfully as a component in other dishes. Serve it over rice for a quick weeknight dinner, or use it as a base for hearty sandwich fillings. Top baked potatoes or sweet potatoes with generous portions for a complete meal. Create chili cheese fries by layering crispy fries with chili and melted cheese.
For low-carb dinner options, serve chili in bowls topped generously with cheese and sour cream, omitting bread entirely. Venison chili fits perfectly into paleo and keto dietary approaches thanks to its lean protein and minimal carbohydrates.
Storage and Make-Ahead Tips
Venison chili stores beautifully, making it ideal for meal preparation and entertaining. Allow cooked chili to cool to room temperature before refrigerating—typically 1-2 hours. Store in airtight containers for up to four days in the refrigerator. The flavors actually improve during storage as ingredients continue melding together.
Freezing venison chili works excellently for up to three months. Portion into meal-sized containers or freezer bags for convenient defrosting. Leave approximately one inch of headspace in containers as the chili expands slightly when frozen. Thaw overnight in the refrigerator, then reheat gently on the stovetop over low heat, adding a splash of broth if needed to restore original consistency.
When reheating, never boil chili vigorously as this can cause meat to toughen and flavors to become harsh. Instead, warm over medium-low heat, stirring occasionally, until steam rises gently from the surface. This slow approach preserves the chili’s refined flavor profile developed during initial cooking.
For an elegant presentation at dinner parties, prepare chili completely 1-2 days ahead. This allows you to focus on final preparations and presentation rather than managing cooking processes during your event. Simply reheat gently while guests arrive, then serve with your carefully prepared accompaniments.
Venison chili also freezes beautifully in ice cube trays for convenient portioning. Once frozen solid, transfer cubes to freezer bags for long-term storage. Individual portions thaw quickly and work perfectly for quick lunches or additions to other dishes.
FAQ
Can I substitute venison with other game meats?
Absolutely. Elk, moose, or even wild boar work wonderfully using these same techniques. Each has slightly different flavor profiles—elk is milder than venison, while wild boar carries richer, porkier notes. Adjust cooking times based on meat toughness; older animals may require additional cooking time. The fundamental technique remains consistent across all game meats.
What if I can’t find venison locally?
Several specialty online retailers ship quality venison nationwide. Check Wild Venison or similar suppliers offering farm-raised venison. Alternatively, visit local hunting clubs or ask at butcher shops about sourcing options. Many regions have hunters willing to share their harvest with those who can’t hunt themselves.
Does venison chili taste gamey?
Properly prepared venison chili shouldn’t taste unpleasantly gamey. The key lies in sourcing well-aged venison and using cooking techniques that balance rather than emphasize wild flavors. Adding bacon fat, using aromatic vegetables, and incorporating warm spices all work together to create a sophisticated, not overly gamey, final dish. If your chili tastes too gamey, future batches will improve with properly aged venison from better sources.
Can I make this in a slow cooker?
Yes, though you’ll miss the browning step crucial for flavor development. Brown venison and bacon in a skillet first, then transfer to a slow cooker with remaining ingredients. Cook on low for 6-8 hours. The extended cooking time in a slow cooker can make venison slightly more tender but potentially less flavorful than stovetop versions. For best results, brown components thoroughly before slow cooking.
How do I know when venison is properly cooked?
Venison should be fork-tender, piercing easily without resistance. The meat should nearly fall apart when pressed with a spoon. Unlike beef, where some prefer pink centers, venison should be fully cooked throughout. Properly cooked venison in chili becomes incredibly tender due to collagen breakdown, creating a silky mouthfeel that melts on the tongue.
What’s the difference between venison chili and traditional beef chili?
The primary difference is venison’s leanness requiring added fat for proper texture and mouthfeel. Venison also brings earthier, more complex flavors benefiting from warm spice profiles. Cooking times may extend slightly for venison to achieve optimal tenderness. The fundamental technique remains similar, but respecting venison’s unique characteristics produces superior results compared to simply substituting it into beef chili recipes.
Can I make this recipe with ground venison?
Absolutely. Use 3 pounds ground venison and brown it thoroughly before proceeding with remaining steps. Break the meat into small pieces during browning rather than compacting it into a mass. Ground venison chili cooks faster—approximately 1.5 to 2 hours—since the smaller pieces tenderize more quickly. The texture differs from chunky venison chili but offers its own appeal and convenience.


