Flaky Quiche Crust Recipe: Grandma’s Secret to Perfect Pastry
There’s something magical about biting into a quiche with a crust so flaky it practically shatters on your fork. My grandmother guarded her quiche crust recipe like treasure, and after years of begging, she finally shared her secrets with me. The difference between a mediocre quiche and an extraordinary one lies entirely in the crust—and trust me, once you master this technique, you’ll never buy frozen pie shells again.
The key to achieving that coveted flakiness isn’t complicated, but it does require understanding a few fundamental principles about how butter, flour, and water interact. This grandmother-approved method has been perfected over decades, and I’m thrilled to share every detail with you. Whether you’re planning a sophisticated brunch or a casual weeknight dinner, this crust will elevate your quiche from ordinary to unforgettable.
What makes this recipe truly special is the combination of cold butter, proper technique, and one surprising ingredient that keeps the crust tender without sacrificing structure. Let’s dive into the complete process, from ingredient selection to that final golden-brown masterpiece.
Why This Quiche Crust Recipe Works
The science behind a flaky crust is straightforward: you need distinct layers of fat separated by flour. When butter (which contains water) heats in the oven, the water turns to steam, creating those beautiful, delicate layers. The trick is keeping the butter cold enough that it doesn’t fully incorporate into the dough before baking.
My grandmother’s secret was understanding that temperature control is everything. She would chill her mixing bowl, her ingredients, and even her hands before starting. This grandmother-approved approach might seem obsessive, but the results speak for themselves. The crust stays tender, flaky, and holds together beautifully when filled and baked.
Unlike other pastry crusts, this particular recipe is forgiving. It doesn’t require a food processor (though one helps), and it won’t fall apart if you handle it gently. The dough is sturdy enough for home cooks to work with confidently, yet produces results that rival professional bakeries.
This is the same crust my grandmother used for her grandma approved dinner recipes, proving its versatility. You can use it for savory quiches, sweet custard tarts, or any number of applications.
Essential Ingredients Explained
Flour: Use all-purpose flour for the best results. The protein content strikes the perfect balance between structure and tenderness. Some bakers swear by cake flour for extra flakiness, but all-purpose is more reliable for consistent results.
Butter: This is non-negotiable—use real, unsalted butter. The water content in butter is what creates steam and flakiness. Margarine simply won’t work. Cut it into small cubes and keep it in the freezer until the moment you need it.
Salt: A pinch of salt enhances flavor and strengthens the gluten network slightly. This helps the crust hold together without becoming tough.
Ice Water: This is crucial. The water must be ice-cold to prevent the butter from softening prematurely. Have ice water ready before you begin mixing.
The Secret Ingredient: My grandmother’s trick was adding a tablespoon of apple cider vinegar or white vinegar. The acid inhibits gluten development, keeping the crust tender while the acidity helps the butter stay distinct. It’s a game-changer that most home cooks never discover.
Step-by-Step Instructions
Ingredients (makes one 9-inch crust):
- 1¼ cups all-purpose flour
- ½ teaspoon salt
- ½ cup (1 stick) unsalted butter, cubed and frozen
- 1 tablespoon apple cider vinegar
- 4-6 tablespoons ice water
Step 1: Prepare Your Workspace
Before mixing anything, place your mixing bowl in the freezer for 10 minutes. Chill your tools if possible. This might seem excessive, but temperature is your biggest ally in achieving flakiness. Your grandmother knew that shortcuts here lead to disappointment later.
Step 2: Combine Dry Ingredients
In your chilled bowl, whisk together flour and salt. Make sure the salt is evenly distributed—this prevents any salty pockets in the finished crust. Whisking also aerates the flour slightly, contributing to a lighter texture.
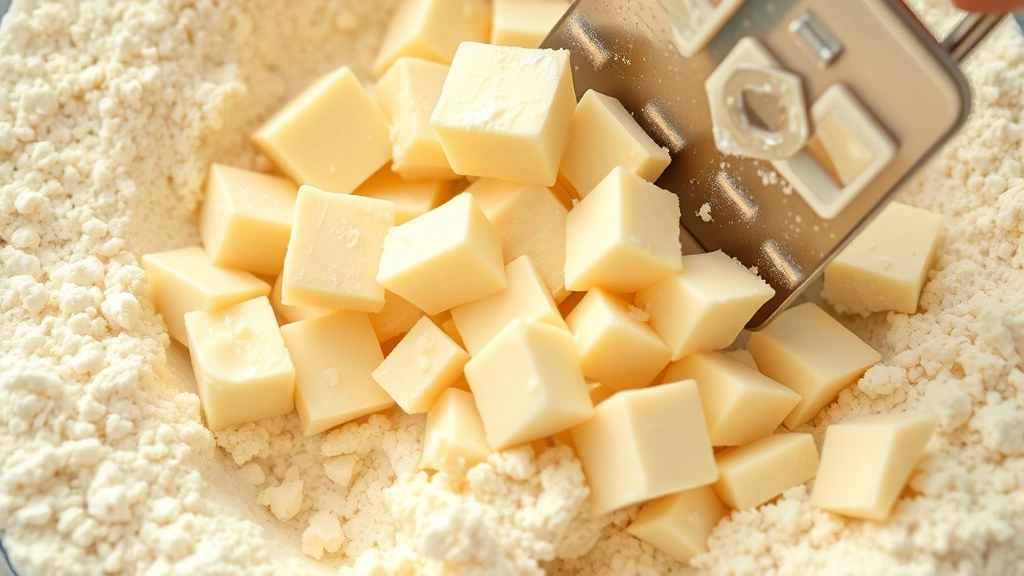
Step 3: Cut in the Butter
Add your frozen butter cubes to the flour mixture. Using a pastry cutter, two knives, or your fingertips, work the butter into the flour. The goal is creating pea-sized pieces of butter throughout the mixture. This is where patience matters—don’t overwork this step. You want distinct butter pieces, not a uniform paste.
If you’re using your fingertips (grandmother’s preferred method), work quickly and gently. The friction from your hands will warm the butter, so speed matters. You should see visible butter specks in the dough.
Step 4: Add the Vinegar
Sprinkle the apple cider vinegar over the mixture. This ingredient is essential—it weakens the gluten network, creating tenderness. Toss everything together gently with a fork.
Step 5: Add Ice Water Gradually
Add ice water one tablespoon at a time, mixing gently with a fork after each addition. The dough should come together when squeezed but shouldn’t be wet or sticky. Stop adding water as soon as the dough holds together. This is a critical moment—too much water creates a tough crust, too little creates a crumbly one that won’t hold filling.
Step 6: Form and Chill
Shape the dough into a flat disk (not a ball—flat disks chill faster and roll out more easily). Wrap it in plastic wrap and refrigerate for at least one hour, preferably overnight. This resting period allows the gluten to relax and the flour to fully hydrate.
The Chilling Process Matters
This step cannot be rushed. When you chill the dough, several important things happen simultaneously. The flour continues absorbing water, creating a more cohesive dough that’s less likely to crack when rolling. The butter solidifies again, ensuring those distinct layers that create flakiness.
My grandmother would often prepare her dough the night before, allowing it to chill overnight. She claimed this made the absolute best crusts, and I’ve confirmed this through years of testing. The longer chill time results in a more tender, flaky final product.
When you’re ready to roll out the dough, let it sit at room temperature for about 5-10 minutes first. This prevents cracking during rolling. The dough should be cold but slightly pliable—not rock-hard and not soft.
Rolling Out Tips:
- Use a well-floured surface and a floured rolling pin
- Roll from the center outward, rotating the dough frequently
- Aim for a circle about 11-12 inches in diameter for a 9-inch pie pan
- If the dough cracks, pinch it back together—this dough is forgiving
- Transfer to your pan gently, easing it into the corners without stretching
If at any point during rolling the dough becomes too warm and sticky, refrigerate it for 10 minutes. This is especially important during warm weather or in a warm kitchen.
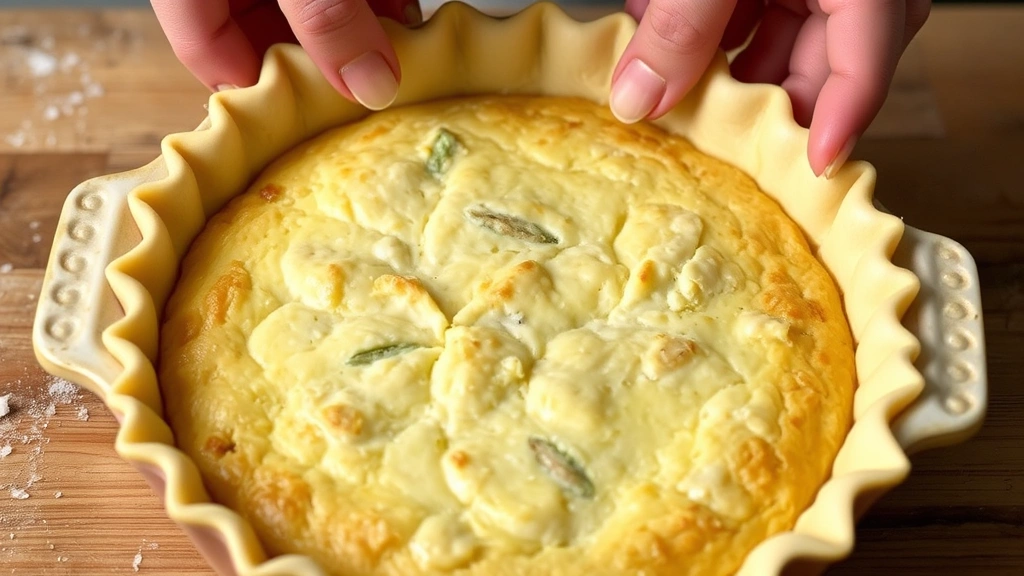
Blind Baking Technique
For quiche, blind baking (partial pre-baking) is essential. It prevents a soggy bottom crust when you add wet custard filling. Here’s the proper technique:
What You’ll Need:
- Parchment paper or aluminum foil
- Pie weights, dried beans, or uncooked rice
- Your oven preheated to 375°F
The Process:
- Line your crust with parchment paper or foil, leaving an overhang
- Fill with pie weights (or beans/rice) to cover the bottom completely
- Bake for 12-15 minutes until the edges are light golden
- Carefully remove the weights and parchment
- Return to the oven for 3-5 minutes more
- Remove and let cool slightly before adding filling
The goal is partially setting the crust without fully baking it. The bottom should look slightly dry and pale golden, not deeply browned. This gives you a head start on cooking the bottom while ensuring it won’t be soggy when the custard is added.
Pro tip: Save your pie weights or beans in a dedicated container. My grandmother kept the same beans for decades, using them exclusively for pie baking. This prevents any cooking flavors from transferring to your crust.
Troubleshooting Common Problems
Crust Cracks While Rolling: This means your dough is too cold or too dry. Let it warm slightly at room temperature, or add a few drops of water to the dough. Don’t panic—small cracks can be pinched together.
Crust Shrinks During Baking: The dough was stretched too much when transferring to the pan, or it wasn’t chilled long enough before baking. Always chill for at least 30 minutes before blind baking, and avoid stretching the dough.
Crust Is Tough Instead of Flaky: You either added too much water, overworked the dough, or didn’t use cold enough ingredients. Remember: less water is better, minimal mixing is better, and maximum coldness is better.
Soggy Bottom Crust: You skipped or rushed the blind baking step. Don’t skip it with quiche—the moisture from the custard will always penetrate an unbaked crust. Alternatively, brush the partially baked crust with a thin layer of egg white before adding filling, which creates a moisture barrier.
Burnt Edges, Underbaked Bottom: Cover the edges with foil if they brown too quickly during the final baking. The rest of the quiche will continue cooking while the edges are protected.
Variations and Flavor Options
While my grandmother’s basic recipe is perfect on its own, there are endless ways to customize it. You can adapt this quiche crust recipe for different flavor profiles or dietary needs.
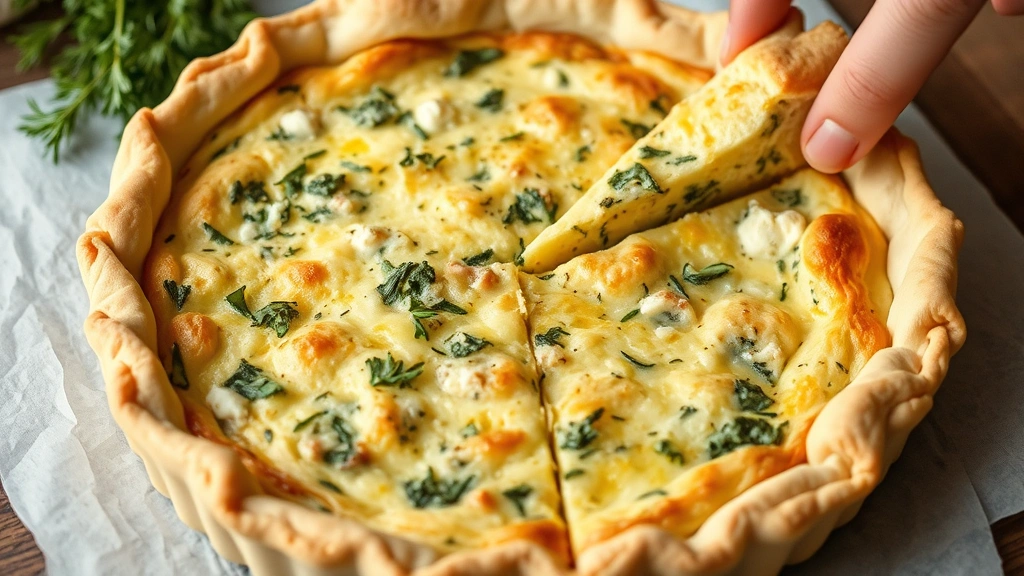
Herb Crust: Add 1-2 tablespoons of finely chopped fresh herbs (thyme, rosemary, or parsley) to the flour mixture. This pairs beautifully with vegetable or cheese quiches. If you’re growing herbs at home, check out our guide on how to preserve herbs for year-round options.
Whole Wheat Version: Substitute up to ½ cup of whole wheat flour for all-purpose flour. This creates a nuttier flavor and slightly heartier texture. Reduce water slightly as whole wheat absorbs more liquid.
Cheese Crust: Add ½ cup finely grated sharp cheddar or Gruyère to the flour mixture. This is phenomenal for savory quiches and adds richness without requiring additional fat.
Gluten-Free Version: Replace all-purpose flour with a high-quality gluten-free all-purpose blend. These blends are formulated to mimic all-purpose flour’s behavior. Use the same proportions and technique. For more gluten-free baking inspiration, explore our gluten-free cake recipe.
Nutty Crust: Add ¼ cup finely ground almonds, pecans, or walnuts to the flour mixture, reducing flour by the same amount. This adds texture and subtle flavor complexity.
Each variation maintains the flakiness principle—keeping butter cold and distinct is always the priority, regardless of what else you add.
FAQ
Can I Make This Quiche Crust Recipe Ahead?
Absolutely! The dough can be made up to 3 days in advance and refrigerated. It can also be frozen for up to 3 months. Thaw frozen dough in the refrigerator overnight before rolling out. You can even freeze the dough after it’s been rolled into the pie pan—just add an extra 5 minutes to the blind baking time.
What’s the Difference Between This and Store-Bought Crusts?
Homemade crusts are superior in every way. Store-bought versions contain preservatives, often use shortening instead of butter, and lack the fresh flavor. The texture is also noticeably different—homemade crusts are genuinely flaky, while commercial versions are often dense. Plus, making your own costs a fraction of the price and tastes infinitely better.
Can I Use a Food Processor?
Yes, though my grandmother preferred hand-mixing. If using a food processor, pulse the flour and salt, add frozen butter pieces, and pulse until the mixture resembles coarse crumbs. Add vinegar and pulse once or twice, then add water one tablespoon at a time, pulsing briefly after each addition. Don’t overprocess—the dough should still have visible butter pieces.
Why Does My Crust Puff Up in the Oven?
This usually means moisture got trapped in the dough. Ensure your ingredients and tools are cold, and don’t add too much water. Also, make sure to poke the bottom of the crust with a fork before blind baking to allow steam to escape.
Can I Make a Double Crust with This Recipe?
Yes! Simply double all the ingredients and divide the dough in half. One portion becomes the bottom crust, the other the top. Chill both before rolling out. This works perfectly for savory quiches where you want a top crust.
What If I Don’t Have Apple Cider Vinegar?
White vinegar or lemon juice works as a substitute. The acid is what matters—it’s the secret ingredient that keeps the crust tender. Don’t skip this step; it makes a noticeable difference.
How Do I Know When the Dough Is Ready?
The dough should hold together when squeezed but shouldn’t be sticky or wet. It should feel slightly crumbly on the surface but cohesive underneath. If you can form it into a ball and it holds together, you’ve added enough water.
Can I Use Salted Butter?
Unsalted butter is preferred because it lets you control the salt content precisely. If you only have salted butter, reduce the salt in the recipe to ¼ teaspoon.
What Quiches Work Best with This Crust?
This crust is versatile and works with any quiche filling. Classic combinations include easy instant pot recipes for quick fillings, or traditional French preparations. Spinach and feta, bacon and cheddar, mushroom and thyme, or caramelized onion all shine with this crust.
Final Thoughts:
My grandmother’s secret to the perfect quiche crust wasn’t really a secret at all—it was simply understanding the fundamentals of pastry making and executing them with care. Cold ingredients, proper technique, and patience are the real keys to success. Once you’ve made this crust a few times, you’ll develop an intuition for it, and it’ll become second nature.
The beauty of this recipe is that it’s simultaneously precise and forgiving. Follow the guidelines, stay cold, and you’ll produce results that taste like they came from a professional bakery. Your family will be amazed, and you’ll have mastered a skill that elevates countless dishes. Explore more fresh plated daily blog recipes to pair with your perfect quiche crust.


